In this section, we’ll build a page for editing a post. We’ll also learn how to update a post by sending a PATCH HTTP request to our server.
Link to the Edit Post Page
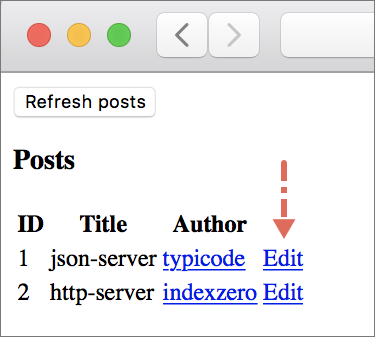
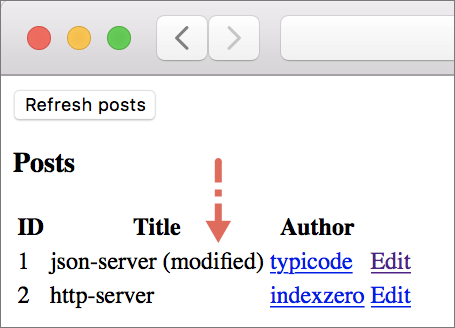
Let’s add a link that says Edit next to each row in the posts table. When that link is clicked, we’ll take users to a different page which contains a form for updating information associated with a post. Add a new cell to the bottom of viewPost in Page/ListPosts.elm.
viewPost : Post -> Html Msg
viewPost post =
    let
        postPath =
            "/posts/" ++ Post.idToString post.id
    in
    tr []
        .
        .
        , td []
            [ a [ href postPath ] [ text "Edit" ] ]
        ]
post.id is a custom type, so we need to convert it to a string by calling the Post.idToString function. Start json-server and elm-live using the following commands from beginning-elm directory in separate terminal windows if they aren’t running already.
$ json-server --watch server/db.json -p 5019

$ elm-live post-app/Main.elm --pushstate
Go to http://localhost:8000/posts and you should see the Edit links.
The following sequence diagram shows all the steps our app goes through when an Edit link is clicked from the ListPosts page. We haven’t implemented all of those steps yet. We’ll use the following diagram as a guide for implementing the rest of the code needed for the EditPost page to fully work.

Step 8: Extracting Post Route from URL
Steps 1 through 7 shown in the diagram above are already in place. Let’s implement step 8 by adding a new data constructor called Post to the Route type in Route.elm.
type Route
    = NotFound
    | Posts
    | Post PostId
We need to import the Post module in Route.elm.
module Route exposing (Route(..), parseUrl)

import Post exposing (PostId)
.
.
An edit link contains a post’s ID in string format.

We’ll be converting a post’s ID from string to the PostId type and assign it as a payload to the Post data constructor. To do that we need to add a new parser to matchRoute in Route.elm.
matchRoute : Parser (Route -> a) a
matchRoute =
    oneOf
        [ map Posts top
        , map Posts (s "posts")
        , map Post (s "posts" </> Post.idParser)
        ]
The table below shows which parser in matchRoute is responsible for matching which path in a given URL.
| URL | Path | Parser | Route |
|---|---|---|---|
http://localhost:8000 |
top |
Posts |
|
http://localhost:8000/posts |
/posts |
s "posts" |
Posts |
http://localhost:8000/posts/1 |
/posts/1 |
s "posts" </> Post.idParser |
Post PostId |
The parser for matching an individual post route uses </> to combine two different parsers.

Next we need to define idParser. Add the following code to the bottom of Post.elm.
idParser : Parser (PostId -> a) a
idParser =
    custom "POSTID" <|
        \postId ->
            Maybe.map PostId (String.toInt postId)
We also need to expose idParser and import Url.Parser in Post.elm.
module Post exposing
    ( Post
    , PostId
    , idParser
    , idToString
    , postDecoder
    , postsDecoder
    )

import Url.Parser exposing (Parser, custom)
.
.
Primitive Parsers
The Url.Parser module defines three primitive parsers as shown below.
int : Parser (Int -> a) a

string : Parser (String -> a) a

s : String -> Parser a a
To understand how these parsers work, let’s imagine a type called FakeRoute.

- Primitive Type as an ID
- As noted in the Using Custom Types for ID section, it’s not a good practice to use primitive types such as
IntorStringfor an identifier. We ignored that best practice when we definedFakeRoutebecause we want to see what the code for parsing those primitive values looks like. In a production app, a properly definedFakeRoutewould look something like this: -

Here are all the parsers for matching routes listed in FakeRoute:
matchFakeRoute : Parser (Route -> a) a
matchFakeRoute =
    oneOf
        [ map Home top
        , map Posts (s "posts")
        , map Post (s "posts" </> int)
        , map User (s "user" </> string)
        , map Comment (s "user" </> string </> s "comment" </> int)
        ]
The table below shows which path gets parsed to which route based on the logic in matchFakeRoute.
| Path | Parser | Route |
|---|---|---|
top |
Home |
|
/posts |
s "posts" |
Posts |
/posts/1 |
s "posts" </> int |
Post 1 |
/user/pam |
s "user" </> string |
User "pam" |
/user/pam/comment/12 |
s "user" </> string </> s "comment" </> int |
Comment "pam" 12 |
To understand how s, int, and string work together, let’s unpack the line for parsing an individual post’s path in matchFakeRoute.
map Post (s "posts" </> int)Both string and int parsers pluck values out of a path, whereas s simply matches the given string. So when we use s "posts" </> int to parse /posts/1, the s parser first verifies that the path indeed starts with posts. After that the int parser comes in and extracts 1 from the path.
Now that the path has been parsed successfully, we need to map the result to the Post data constructor from FakeRoute. It’s important to note that s expects the path segment to match exactly. Therefore if the given path is /postss/1, it’ll fail.
The s "user" </> string parser works in a similar way. Let’s say the path we’re parsing is /user/pam. s first verifies that the path starts with user and then the string parser extracts pam.
The s "user" </> string </> s "comment" </> int parser is slightly more complex. Let’s find out how it parses the /user/pam/comment/12 path. s first verifies that the path starts with user. After that the string parser extracts pam and then the s parser once again verifies that pam is followed by comment. Finally, the int parser extracts 12 and the result is mapped to the Comment data constructor.
Custom Parsers
As we saw above, primitive parsers are only capable of converting a path segment to either String or Int. If we need to convert a segment to any other type, we must create our own parser using the custom function from Url.Parser. Here’s the idParser function from Post.elm once again.
idParser : Parser (PostId -> a) a
idParser =
    custom "POSTID" <|
        \postId ->
            Maybe.map PostId (String.toInt postId)
The following diagram explains the custom function’s type signature.

As it turns out behind the scenes the string and int parsers are also defined in terms of custom.
string : Parser (String -> a) a
string =
    custom "STRING" Just
int : Parser (Int -> a) a
int =
custom "NUMBER" String.toIntStep 10: Identify EditPost as the Next Page
Step 9 from the sequence diagram above tells us to store Post in the route field in main model. We’ve already done that in the Main.update function.
update : Msg -> Model -> ( Model, Cmd Msg )
update msg model =
    case ( msg, model.page ) of
        .
        .
        ( UrlChanged url, _ ) ->
            let
                newRoute =
                    Route.parseUrl url
            in
            ( { model | route = newRoute }, Cmd.none )
                |> initCurrentPage
        .
        .
And step 10 tells us to identify EditPost as the next page. We haven’t done that yet. Let’s add a new branch to initCurrentPage in Main.elm for the Post route.
initCurrentPage : ( Model, Cmd Msg ) -> ( Model, Cmd Msg )
initCurrentPage ( model, existingCmds ) =
    let
        ( currentPage, mappedPageCmds ) =
            case model.route of
                .
                .
                Route.Posts ->
                    ...

                Route.Post postId ->
                    let
                        ( pageModel, pageCmd ) =
                            EditPost.init postId model.navKey
                    in
                    ( EditPage pageModel, Cmd.map EditPageMsg pageCmd )
    in
    ...
Now add EditPage to the Page type in Main.elm.
type Page
    = NotFoundPage
    | ListPage ListPosts.Model
    | EditPage EditPost.Model
Creating the EditPost Page
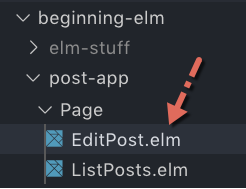
To fully implement step 10 we also need to create the EditPost page module. Create a new file called EditPost.elm inside the Page directory and add the following code to it.
module Page.EditPost exposing (Model)


type alias Model =
    {}
As noted in the Restructuring Code section earlier in this chapter, the central type for each page module is Model. Right now EditPost’s model is an empty record. We’ll expand it as we keep building the page.
The branch for the Post route in Main.update shows that the function for initializing the EditPost page takes a post ID and a navigation key as inputs.
( pageModel, pageCmd ) =
    EditPost.init postId model.navKey
Let’s implement that function by adding the following code to the bottom of EditPost.elm.
init : PostId -> Nav.Key -> ( Model, Cmd Msg )
init postId navKey =
    ( initialModel navKey, fetchPost postId )


initialModel : Nav.Key -> Model
initialModel navKey =
    { navKey = navKey
    }
We need access to navKey in EditPost to navigate users to the ListPosts page after the post data is saved. Let’s add that field to the model in EditPost.elm.
type alias Model =
    { navKey : Nav.Key
    }
Key is defined in the Browser.Navigation module and PostId is defined in the Post module. Let’s import those in EditPost.elm.
module Page.EditPost exposing (Model)

import Browser.Navigation as Nav
import Post exposing (Post, PostId, postDecoder)
.
.
Fetching Post
When the EditPost page is being initialized, we need to fetch a fresh copy of the post we want to edit from the server. The Main module could have grabbed the post record in question from the ListPosts page and sent that directly to EditPost instead of just the ID. That would have saved us a round trip to the server. But what if some other client app has already modified the post we want to edit? By fetching it from the server, we’re always working on the latest version of that record. Add the following code to the bottom of EditPost.elm.
fetchPost : PostId -> Cmd Msg
fetchPost postId =
    Http.get
        { url = "http://localhost:5019/posts/" ++ Post.idToString postId
        , expect =
            postDecoder
                |> Http.expectJson (RemoteData.fromResult >> PostReceived)
        }
fetchPost works similarly to the fetchPosts function we implemented in ListPosts.elm.
fetchPosts : Cmd Msg
fetchPosts =
    Http.get
        { url = "http://localhost:5019/posts/"
        , expect =
            postsDecoder
                |> Http.expectJson (RemoteData.fromResult >> PostsReceived)
        }
The former retrieves just one post whereas the latter retrieves multiple posts. If you don’t remember how the RemoteData.fromResult function works, you may want to review the RemoteData section from chapter 6. Import the Http module in EditPost.elm.
module Page.EditPost exposing (Model)

import Http
.
.
PostReceived Message
Let’s define PostReceived by adding the following code to the bottom of EditPost.elm.
type Msg
    = PostReceived (WebData Post)
Now import RemoteData in EditPost.elm.
module Page.EditPost exposing (Model)

import RemoteData exposing (WebData)
.
.
Next we need to handle the PostReceived message inside update. Add the following code to the bottom of EditPost.elm.
update : Msg -> Model -> ( Model, Cmd Msg )
update msg model =
    case msg of
        PostReceived post ->
            ( { model | post = post }, Cmd.none )
Note: As mentioned in the Restructuring Code section, each page module is provided with the init, update and view functions of its own so that it can independently follow the Elm Architecture.
All we’re doing inside the PostReceived post -> branch is assign the data retrieved from a server to the post field. Let’s add that field to Model in EditPost.elm.
type alias Model =
    { navKey : Nav.Key
    , post : WebData Post
    }
We also need to initialize the post field to RemoteData.Loading in initialModel.
initialModel : Nav.Key -> Model
initialModel navKey =
    { navKey = navKey
    , post = RemoteData.Loading
    }
Showing Edit Post Form
We’re now ready to create a form through which the user will edit post data. Add the following code to the bottom of EditPost.elm.
view : Model -> Html Msg
view model =
    div []
        [ h3 [] [ text "Edit Post" ]
        , viewPost model.post
        ]


viewPost : WebData Post -> Html Msg
viewPost post =
    case post of
        RemoteData.NotAsked ->
            text ""

        RemoteData.Loading ->
            h3 [] [ text "Loading Post..." ]

        RemoteData.Success postData ->
            editForm postData

        RemoteData.Failure httpError ->
            viewFetchError (buildErrorMessage httpError)


editForm : Post -> Html Msg
editForm post =
    Html.form []
        [ div []
            [ text "Title"
            , br [] []
            , input
                [ type_ "text"
                , value post.title
                , onInput UpdateTitle
                ]
                []
            ]
        , br [] []
        , div []
            [ text "Author Name"
            , br [] []
            , input
                [ type_ "text"
                , value post.authorName
                , onInput UpdateAuthorName
                ]
                []
            ]
        , br [] []
        , div []
            [ text "Author URL"
            , br [] []
            , input
                [ type_ "text"
                , value post.authorUrl
                , onInput UpdateAuthorUrl
                ]
                []
            ]
        , br [] []
        , div []
            [ button [ type_ "button", onClick SavePost ]
                [ text "Submit" ]
            ]
        ]


viewFetchError : String -> Html Msg
viewFetchError errorMessage =
    let
        errorHeading =
            "Couldn't fetch post at this time."
    in
    div []
        [ h3 [] [ text errorHeading ]
        , text ("Error: " ++ errorMessage)
        ]


buildErrorMessage : Http.Error -> String
buildErrorMessage httpError =
    case httpError of
        Http.BadUrl message ->
            message

        Http.Timeout ->
            "Server is taking too long to respond. Please try again later."

        Http.NetworkError ->
            "Unable to reach server."

        Http.BadStatus statusCode ->
            "Request failed with status code: " ++ String.fromInt statusCode

        Http.BadBody message ->
            message
The above code listing doesn’t include anything we haven’t covered already, so you should be able to figure out how it works. We need to import the following modules in EditPost.elm for the view code to work properly.
module Page.EditPost exposing (Model)

import Html exposing (..)
import Html.Attributes exposing (..)
import Html.Events exposing (onClick, onInput)
.
.
onInput Messages
The input elements in editForm send separate messages to the Elm runtime whenever their content is modified. Let’s add those messages to the Msg type in EditPost.elm.
type Msg
    = PostReceived (WebData Post)
    | UpdateTitle String
    | UpdateAuthorName String
    | UpdateAuthorUrl String
Now add three separate branches to the update function in EditPost.elm for handling those messages.
update : Msg -> Model -> ( Model, Cmd Msg )
update msg model =
    case msg of
        PostReceived post ->
            ...

        UpdateTitle newTitle ->
            let
                updateTitle =
                    RemoteData.map
                        (\postData ->
                            { postData | title = newTitle }
                        )
                        model.post
            in
            ( { model | post = updateTitle }, Cmd.none )

        UpdateAuthorName newName ->
            let
                updateAuthorName =
                    RemoteData.map
                        (\postData ->
                            { postData | authorName = newName }
                        )
                        model.post
            in
            ( { model | post = updateAuthorName }, Cmd.none )

        UpdateAuthorUrl newUrl ->
            let
                updateAuthorUrl =
                    RemoteData.map
                        (\postData ->
                            { postData | authorUrl = newUrl }
                        )
                        model.post
            in
            ( { model | post = updateAuthorUrl }, Cmd.none )
Since post is of type WebData Post we can’t simply use the syntax for modifying a record to update the title, authorName, and authorUrl fields like this:
UpdateTitle newTitle ->
    let
        oldPost =
            model.post

        updateTitle =
            { oldPost | title = newTitle }
    in
    ( { model | post = updateTitle }, Cmd.none )
That’s why all three branches above have to use the RemoteData.map function. The following diagram illustrates how it works.

Here’s another way of looking at how RemoteData.map transforms a value:

And here’s how RemoteData.map is implemented behind the scenes:
map : (a -> b) -> RemoteData e a -> RemoteData e b
map f data =
    case data of
        Success value ->
            Success (f value)

        Loading ->
            Loading

        NotAsked ->
            NotAsked

        Failure error ->
            Failure error
The e and a type variables represent the Failure and Success values respectively as shown in RemoteData’s definition below.
type RemoteData e a
    = NotAsked
    | Loading
    | Failure e
    | Success a
Saving a Post
To save the modified post data, the user has to click the Submit button. When that happens, the SavePost message is sent to the Elm runtime.
editForm : Post -> Html Msg
editForm post =
        .
        .
        , div []
            [ button [ type_ "button", onClick SavePost ]
                [ text "Submit" ]
            ]
        ]
Let’s add that message to the Msg type in EditPost.elm.
type Msg
    .
    .
    | UpdateAuthorUrl String
    | SavePost
Now add a new branch to update in EditPost.elm for handling the SavePost message.
update : Msg -> Model -> ( Model, Cmd Msg )
update msg model =
    case msg of
        .
        .
        UpdateAuthorUrl newUrl ->
            ...

        SavePost ->
            ( model, savePost model.post )
The SavePost -> branch asks the savePost function to create an HTTP request. Let’s implement that right below update in EditPost.elm.
savePost : WebData Post -> Cmd Msg
savePost post =
    case post of
        RemoteData.Success postData ->
            let
                postUrl =
                    "http://localhost:5019/posts/"
                        ++ Post.idToString postData.id
            in
            Http.request
                { method = "PATCH"
                , headers = []
                , url = postUrl
                , body = Http.jsonBody (postEncoder postData)
                , expect = Http.expectJson PostSaved postDecoder
                , timeout = Nothing
                , tracker = Nothing
                }

        _ ->
            Cmd.none
If the value stored in post is Success, savePost returns a command for updating the post data.
Http.request
Unfortunately, the Http module doesn’t provide a separate function for creating an update request. Therefore, we’re forced to construct our request using a low-level function called Http.request. The Http.get function we saw in chapter 6 also uses Http.request behind the scenes.
get : { url : String, expect : Expect msg } -> Cmd msg
get r =
    request
        { method = "GET"
        , headers = []
        , url = r.url
        , body = emptyBody
        , expect = r.expect
        , timeout = Nothing
        , tracker = Nothing
        }
Http.request takes a record with seven fields. Let’s go through those fields one by one.
method - To update a resource on the server, we need to use the PATCH method.
headers - The headers field allows us to send additional information to the server. Since we don’t want to send any headers, we’re giving it an empty list in savePost.
url - The location of the resource we want to modify.
body - This field contains the modified post data. But first we must translate that data from Elm values to JSON by using the module called Json.Encode. Let’s import it in Post.elm.
module Post exposing
  ...

import Json.Encode as Encode
.
.
We can now create an encoder for Post by adding the following code to the bottom of Post.elm.
postEncoder : Post -> Encode.Value
postEncoder post =
    Encode.object
        [ ( "id", encodeId post.id )
        , ( "title", Encode.string post.title )
        , ( "authorName", Encode.string post.authorName )
        , ( "authorUrl", Encode.string post.authorUrl )
        ]


encodeId : PostId -> Encode.Value
encodeId (PostId id) =
    Encode.int id
We need to expose postEncoder in Post.elm and EditPost.elm.
module Post exposing
    .
    .
    , postEncoder
    )
module Page.EditPost exposing (Model)
import Post exposing (Post, PostId, postDecoder, postEncoder)
.
.The process of encoding Elm values to JSON is the exact opposite of decoding JSON to Elm values. We can’t assign the encoded value directly to the body field though. We need to explicitly tell Http.request that our encoded value is in JSON format by using the Http.jsonBody function.
body = Http.jsonBody (postEncoder postData)This will add the Content-Type: application/json header to our HTTP request behind the scenes. That is how the server knows the body of a request is in JSON format.
expect - By using the Http.expectJson function we’re letting Elm know that we expect the response body to be JSON as well. We’re using the same decoder we created in the Decoding Nested Objects section to decode the response.
expect = Http.expectJson PostSaved postDecodertimeout - Sometimes a server takes forever to return a response. If we don’t want our users to wait too long, we can specify a timeout like this:
timeout = Just (Time.second 30)timeout expects a Maybe. That’s why we need to wrap the value in Just. Since we don’t want to specify a timeout, we’re simply passing Nothing.
timeout = Nothingtracker - This field allows us to track the progress of a request. Since we aren’t interested in our request’s progress, we assigned Nothing to the tracker field.
tracker = NothingPostSaved Message
We’ve covered everything in savePost except the PostSaved message. When the PATCH request is complete, the Elm runtime will send the PostSaved message to update. Let’s add it to the Msg type in EditPost.elm.
type Msg
    .
    .
    | SavePost
| PostSaved (Result Http.Error Post)PostSaved’s payload doesn’t need to be of type WebData because unlike fetchPost we aren’t interested in tracking all the states our PATCH request goes through. All we need to know is whether the request is successful or not. The Result type is perfect for that. Let’s handle PostSaved by adding two new branches to update in EditPost.elm.
update : Msg -> Model -> ( Model, Cmd Msg )
update msg model =
    case msg of
        .
        .
        SavePost ->
            ...

        PostSaved (Ok postData) ->
            let
                post =
                    RemoteData.succeed postData
            in
            ( { model | post = post }, Cmd.none )

        PostSaved (Err error) ->
            ( model, Cmd.none )
If the request is successful, postData will contain the updated Post record. Before we can assign that record to the post field in our model, we have to convert it to the WebData type. RemoteData.succeed is just what we need. It lifts an ordinary value into the realm of RemoteData.

Here’s how the type signature of RemoteData.succeed looks:
succeed : a -> RemoteData e aHandling Post Save Error
The PostSaved (Err error) -> branch above simply returns an unmodified model which is not a good practice. We should always handle errors properly. Here’s what we’re going to do: we’ll save the error in our model and display it below the edit form. Let’s add a new field called saveError to the model in EditPost.elm.
type alias Model =
    { navKey : Nav.Key
    , post : WebData Post
    , saveError : Maybe String
    }
saveError is of type Maybe because there won’t be any error to display if the PATCH request is successful. Let’s initialize it to Nothing in initialModel.
initialModel : Nav.Key -> Model
initialModel navKey =
    { navKey = navKey
    , post = RemoteData.Loading
    , saveError = Nothing
    }
Next we need to assign a proper value to the saveError field in two branches that handle the PostSaved message in update.
update : Msg -> Model -> ( Model, Cmd Msg )
update msg model =
    case msg of
        .
        .
        PostSaved (Ok postData) ->
            let
                post =
                    RemoteData.succeed postData
            in
            ( { model | post = post, saveError = Nothing }
            , Cmd.none
            )

        PostSaved (Err error) ->
            ( { model | saveError = Just (buildErrorMessage error) }
            , Cmd.none
            )
The only thing remaining is to display the error message. Add the following code below the viewFetchError function in EditPost.elm.
viewSaveError : Maybe String -> Html msg
viewSaveError maybeError =
    case maybeError of
        Just error ->
            div []
                [ h3 [] [ text "Couldn't save post at this time." ]
                , text ("Error: " ++ error)
                ]

        Nothing ->
            text ""
And call viewSaveError from view in EditPost.elm.
view : Model -> Html Msg
view model =
    div []
        [ h3 [] [ text "Edit Post" ]
        , viewPost model.post
        , viewSaveError model.saveError
        ]
Taking Users Back to the ListPosts Page
It’d be great if we could take the users back to the ListPosts page after they’ve successfully updated a post. To do that we need to return a command from the PostSaved (Ok postData) -> branch in update using Route.pushUrl as shown below.
update : Msg -> Model -> ( Model, Cmd Msg )
update msg model =
    case msg of
        .
        .
        PostSaved (Ok postData) ->
            let
                post =
                    RemoteData.succeed postData
            in
            ( { model | post = post, saveError = Nothing }
            , Route.pushUrl Route.Posts model.navKey
            )

        PostSaved (Err error) ->
            ...
We haven’t defined the pushUrl function yet. Let’s do that by adding the following code to the bottom of Route.elm.
pushUrl : Route -> Nav.Key -> Cmd msg
pushUrl route navKey =
    routeToString route
        |> Nav.pushUrl navKey


routeToString : Route -> String
routeToString route =
    case route of
        NotFound ->
            "/not-found"

        Posts ->
            "/posts"

        Post postId ->
            "/posts/" ++ Post.idToString postId
All Route.pushUrl does is convert a route to a string path and call Nav.pushUrl like we did in the Main.update function.
update : Msg -> Model -> ( Model, Cmd Msg )
update msg model =
    case ( msg, model.page ) of
        ( LinkClicked urlRequest, _ ) ->
            case urlRequest of
                Browser.Internal url ->
                    ( model
                    , Nav.pushUrl model.navKey (Url.toString url)
                    )

                Browser.External url ->
                    ...
We need to expose pushUrl and also import the Browser.Navigation module in Route.elm.
module Route exposing (Route(..), parseUrl, pushUrl)

import Browser.Navigation as Nav
.
.
We also need to import Route in EditPost.elm.
module Page.EditPost exposing (Model)

import Route
.
.
Moving buildErrorMessage
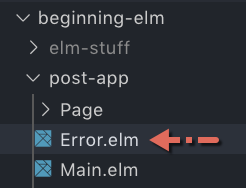
Let’s do some housekeeping by moving the buildErrorMessage function to a new module. Both EditPost.elm and ListPosts.elm implement that function in exactly the same way. We’ll be using buildErrorMessage in other modules too in the future. Create a new file called Error.elm inside the post-app directory and add the code below to it.
module Error exposing (buildErrorMessage)

import Http


buildErrorMessage : Http.Error -> String
buildErrorMessage httpError =
    case httpError of
        Http.BadUrl message ->
            message

        Http.Timeout ->
            "Server is taking too long to respond. Please try again later."

        Http.NetworkError ->
            "Unable to reach server."

        Http.BadStatus statusCode ->
            "Request failed with status code: " ++ String.fromInt statusCode

        Http.BadBody message ->
            message
Now remove buildErrorMessage’s definition from EditPost.elm and ListPosts.elm. After that import the Error module in both of those files.
module Page.EditPost exposing (Model)

import Error exposing (buildErrorMessage)
.
.
module Page.ListPosts exposing (Model, Msg, init, update, view)
import Error exposing (buildErrorMessage)
.
.EditPost.elm only exposes Model right now, but we need to expose Msg, init, update, and view as well. Let’s do that.
module Page.EditPost exposing (Model, Msg, init, update, view)Adding EditPageMsg to Main
Now that we’re done implementing the EditPost page, we need to import it in Main.elm.
module Main exposing (main)

import Page.EditPost as EditPost
.
.
Next we need to add EditPageMsg to the Msg type in Main.elm.
type Msg
    .
    .
    | UrlChanged Url
    | EditPageMsg EditPost.Msg
And handle that message by adding a new branch to update in Main.elm.
update : Msg -> Model -> ( Model, Cmd Msg )
update msg model =
    case ( msg, model.page ) of
        .
        .
        ( UrlChanged url, _ ) ->
            ...

        ( EditPageMsg subMsg, EditPage pageModel ) ->
            let
                ( updatedPageModel, updatedCmd ) =
                    EditPost.update subMsg pageModel
            in
            ( { model | page = EditPage updatedPageModel }
            , Cmd.map EditPageMsg updatedCmd
            )

        ( _, _ ) ->
            ...
The branch for handling EditPageMsg looks very similar to the one that handles ListPageMsg which is already covered in the Updating Page Models section. This marks the completion of step 10 from the sequence diagram above. Step 11 and 12 are also in place already.
Step 13 - 17: Return EditPost View
We can take care of the rest of the steps by adding a new branch for EditPage to the currentView function in Main.elm.
currentView : Model -> Html Msg
currentView model =
    case model.page of
        .
        .
        ListPage pageModel ->
            ...

        EditPage pageModel ->
            EditPost.view pageModel
                |> Html.map EditPageMsg
If you don’t remember how Html.map works, you may want to review the Displaying Current Page section.
Testing the EditPost Page
Phew. That was a lot of code we had to write to make the EditPost page work. We’re now ready to test it. Run json-server and elm-live from the beginning-elm directory in separate terminal windows if they aren’t running already.
$ json-server --watch server/db.json -p 5019

$ elm-live post-app/Main.elm --pushstate
Check the elm-live window in terminal to make sure everything compiled successfully. Now go to http://localhost:8000 and you should see a list of posts.
Click the Edit link next to typicode and you’ll be taken to the EditPost page. The URL in browser’s address bar will also change to http://localhost:8000/posts/1.
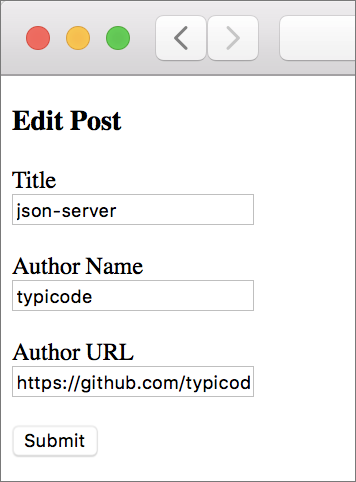
Now update the title to json-server (modified) and click Submit.

You should be taken back to the ListPosts page and there you should see the modified title.
Summary
In this section, we built a separate page for editing a post. We learned how to modify a resource on a server using the PATCH HTTP request. Along the way, we figured out how to properly navigate users to the EditPost page. We saw what an HTTP request is really made up of by understanding each field in the record given to Http.request. Finally, we learned how to encode Elm values into JSON using the Json.Encode module. In the next section, we’ll delete a post by sending a DELETE HTTP request to our server.