In the Easy to Test section, we learned how to write unit tests. A unit test runs the code under test with an input scenario, and then verifies that the output is correct. It’s important to note that a unit test runs the code only once. That means a single test covers only one input scenario. For example, the
orGate function we implemented earlier in this chapter only has four possible values in its input set, so we need four unit tests to fully verify that it behaves as expected.
orGate : Int -> Int -> Int
orGate a b =
    Bitwise.or a b
It’s quite easy to write those four tests, but when a function’s input set is much bigger, writing unit tests to cover most input scenarios starts to become tedious. The rippleCarryAdder function, for example, takes nine signals as input which creates 2 ^ 9 = 512 different scenarios.
rippleCarryAdder a b carryIn =
    let
        -- Extract digits
        firstSignal =
            extractDigits a

        secondSignal =
            extractDigits b

        -- Compute sum and carry-out
        firstResult =
            fullAdder firstSignal.d3 secondSignal.d3 carryIn

        secondResult =
            fullAdder firstSignal.d2 secondSignal.d2 firstResult.carry

        thirdResult =
            fullAdder firstSignal.d1 secondSignal.d1 secondResult.carry

        finalResult =
            fullAdder firstSignal.d0 secondSignal.d0 thirdResult.carry
    in
    [ finalResult, thirdResult, secondResult, firstResult ]
        |> List.map .sum
        |> (::) finalResult.carry
        |> numberFromDigits
To fully verify rippleCarryAdder’s behavior, we need to write 512 unit tests. That’s a lot of tests. Granted, we don’t usually need 100% test coverage. We only need enough tests to reach a given level of confidence. But even if we want to achieve 50% test coverage, that’s still a lot of tests to write.
A better alternative is to use fuzz tests. A fuzz test runs the code under test over and over with randomly generated inputs. Before we find out how fuzz tests make it easier to test functions like rippleCarryAdder, let’s write a few simple fuzz tests to understand how they work.
- Fuzzing
- “The term ‘fuzzing’ originates from a 1988 class project, taught by Barton Miller at the University of Wisconsin. To fuzz test a Unix utility meant to automatically generate random files and command-line parameters for the utility. The project was designed to test the reliability of Unix programs by executing a large number of random inputs in quick succession until they crashed.” — Wikipedia
A Simple Fuzz Test
Create a new file called FuzzTests.elm in the beginning-elm/tests directory and add the code below to it.

module FuzzTests exposing (addOneTests)

import Expect exposing (Expectation)
import Fuzz exposing (..)
import Test exposing (..)


addOneTests : Test
addOneTests =
    describe "addOne"
        [ fuzz int "adds 1 to any integer" <|
            \num ->
                addOne num |> Expect.equal (num + 1)
        ]


addOne : Int -> Int
addOne x =
    1 + x
We created a new module called FuzzTests and imported a bunch of other modules that enable us to write fuzz tests. We also created a function that adds 1 to a given integer. Finally, we wrote a fuzz test that verifies the addOne function works as expected.
Note: It’s perfectly fine to include regular functions like addOne that don’t test anything in a test module. Elm doesn’t make any distinction between a test module and a regular module. That said, in a real project it’s best practice to put the production code and tests in separate modules. To make things simpler, we’ll ignore that best practice in this section and include the code we want to test in the same module.
The following diagram explains various components of a fuzz test.

The structure of a fuzz test looks very similar to that of a unit test. There are only three differences:
Difference #1: A fuzz test is created using the function called fuzz, whereas a unit test is created using the test function. Both of these functions are defined in the Test module.
Difference #2: fuzz takes three arguments whereas the test function takes two.

The first argument to fuzz is a fuzzer that knows how to generate values of a given type. In the above example, we used the int fuzzer which generates a 32-bit integer value. By default, it generates 100 values between -50 and 50. Since 0 is notorious for introducing edge cases in most code, the int fuzzer makes sure that 0 is one of the generated values.
The Fuzz module provides a fuzzer for commonly used built-in types. Here are some examples: float, string, list, and maybe. We can also create a fuzzer for a custom type of our own.
All fuzzers are defined in the Fuzz module, but the fuzz function itself is defined in the Test module. That’s why we need to import both modules when we write fuzz tests.
Difference #3: The anonymous function that contains the fuzz test uses a real parameter (num) instead of an underscore (_) because that parameter is actually used inside the test. In a unit test, elm-test passes a unit type which is unusable. Therefore, we simply ignored it.

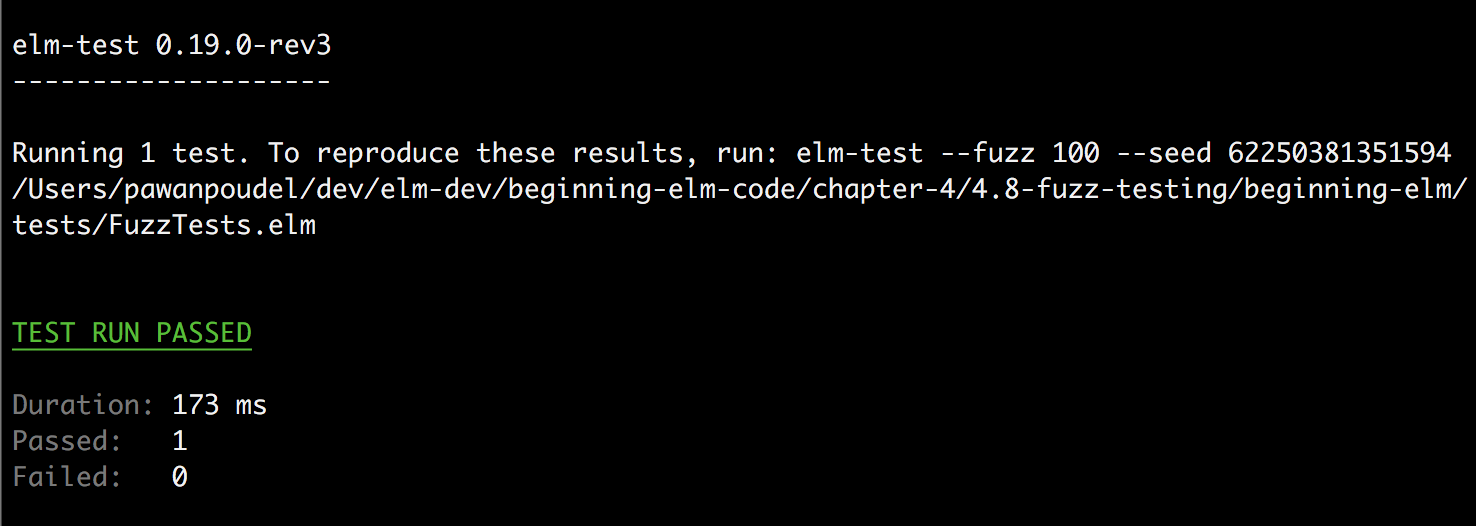
Run elm-test tests/FuzzTests.elm from the beginning-elm directory in terminal to execute that test in FuzzTests.elm. Running a fuzz test is no different than running a unit test. The output should look very similar to that of a unit test.
- Reproducing a Test Result
- You may have noticed that all test outputs we’ve seen so far contain the following text.
-
To reproduce these results, run: elm-test --fuzz 100 --seed <seed-value> -
elm-testuses a random number generator (RNG) to create random values for each fuzzer. A RNG takes an initial value called seed and uses an algorithm to generate a seemingly random number. Given an initial seed, we can always predict the values generated by a RNG, which means fuzz tests are deterministic if we know the initial seed. So if we need to reproduce the results from a specific run of a fuzz test, we can run theelm-testcommand with the--seedoption. The--fuzzoption specifies how many times a fuzz test should run. -
We’ll cover random number generators in detail in the Generating Random Numbers section in chapter 5.
Failing Fuzz Test
Let’s see what a failing fuzz test looks like. Replace + with - in the addOne function inside FuzzTests.elm like this:
addOne : Int -> Int
addOne x =
    1 - x
Instead of adding x to 1, it now subtracts it. If you run elm-test tests/FuzzTests.elm once again from the beginning-elm directory in terminal, you should see a failing test.

The output looks almost exactly the same as a failing unit test. There’s just one tiny difference. Also, fuzz tests fail more intelligently compared to unit tests. Let’s explore these differences by adding a unit test to addOneTests in FuzzTests.elm.
addOneTests : Test
addOneTests =
    describe "addOne"
        [ fuzz int "adds 1 to any integer" <|
            \num ->
                addOne num |> Expect.equal (num + 1)
        , test "when 1 is added to 2, the result is 3" <|
            \_ ->
                addOne 2 |> Expect.equal 4
        ]
It’s perfectly fine to combine unit and fuzz tests as we’ve done here. If you run elm-test tests/FuzzTests.elm again, you should see two failing tests.

Notice how the fuzz test output shows Given 1. With a unit test, we know exactly what value the test failed on just by looking at the test. We passed 2 to addOne, so we definitely know that the function doesn’t work if the input is 2. However, with a fuzz test we can’t tell which value the test failed on just by looking at its implementation. elm-test runs the same fuzz test multiple times with different values. In our case, the int fuzzer generates a value between -50 and 50 and feeds that into the test. There is no way of knowing what that value is.
The current (incorrect) logic in the addOne function passes for 0, but fails for all non-zero values. So, why did the test output report that the function logic fails for 1 instead of any other randomly chosen number? That’s because when a fuzz test fails, instead of showing us the first value the test failed on, it tries to shrink the failing input to the smallest and simplest value possible. That way it’s easier for us to investigate why the test failed.
Property Based Testing
The fuzz test we wrote above is equivalent to hundred unit tests because it runs the same test with hundred different input values. We can run it with even more inputs if we want. While a unit test is focused on verifying one specific input scenario works correctly, a fuzz test, on the other hand, is focused on making sure an important property holds true for all inputs and outputs. For example, the addOne function must satisfty this property: the difference between the output and input value is always exactly 1.
Compared to unit tests, fuzz tests make it possible to test the behavior of our code on a much higher level. Instead of coming up with individual input scenarios, we can think of properties that must hold true for our code and then write fuzz tests to make sure that those properties do hold true. Because of this, writing fuzz tests could turn out to be much more challenging than writing individual unit tests especially if our code is complex. We have to think very carefully about the exact properties our code exhibits.
We should always prefer fuzz tests to unit tests because they give us the most bang for our buck. If we come across edge cases that aren’t covered by fuzz tests then it’s okay to supplement our test suite with unit tests. Otherwise, if a unit test isn’t providing additional value, we should just delete it. Speaking of which, let’s remove the unnecessary unit test from addOneTests in FuzzTests.elm.
addOneTests : Test
addOneTests =
    describe "addOne"
        [ fuzz int "adds 1 to any integer" <|
            \num ->
                addOne num |> Expect.equal (num + 1)
        ]
Let’s also fix the logic in addOne function by replacing - with +.
addOne : Int -> Int
addOne x =
    1 + x
Multiple Fuzzers
It’s very common for Elm functions to take multiple arguments, so knowing how to generate only one random input value isn’t enough. Luckily, elm-test makes it easy to generate multiple values. Let’s add a new function called add to the bottom of FuzzTests.elm.
add : Int -> Int -> Int
add x y =
    x + y
To test this function we need to generate two random values. We can do that by using the fuzz2 function. Add the following test to the bottom of FuzzTests.elm.
addTests : Test
addTests =
    describe "add"
        [ fuzz2 int int "adds two given integers" <|
            \num1 num2 ->
                add num1 num2
                    |> Expect.equal (num1 + num2)
        ]
And expose addTests in the module definition.
module FuzzTests exposing (addOneTests, addTests)Now run elm-test tests/FuzzTests.elm from the beginning-elm directory in terminal. You should see that all tests have passed including the one we just wrote.
The fuzz2 function is also defined in the Test module and works just like fuzz. The only difference is that it takes two fuzzers. Here’s how its type signature looks:
fuzz2
    :  Fuzzer a
    -> Fuzzer b
    -> String
    -> (a -> b -> Expectation)
    -> Test
If we need three random inputs, we can use fuzz3. Here’s how its type signature looks:
fuzz3
    :  Fuzzer a
    -> Fuzzer b
    -> Fuzzer c
    -> String
    -> (a -> b -> c -> Expectation)
    -> Test
Controlling Fuzz Test Runs
Earlier we learned that, by default, each fuzz test is run hundred times with different inputs. We can control how many times a test runs by using the fuzzWith function, which is also defined in the Test module. Here’s how its type signature looks:
fuzzWith
    :  FuzzOptions
    -> Fuzzer a
    -> String
    -> (a -> Expectation)
    -> Test


type alias FuzzOptions =
    { runs : Int }
Let’s rewrite the test inside addOneTests in FuzzTests.elm using fuzzWith.
addOneTests : Test
addOneTests =
    describe "addOne"
        [ fuzzWith { runs = 200 } int "adds 1 to the given integer" <|
            \num ->
                addOne num |> Expect.equal (num + 1)
        ]
Run elm-test tests/FuzzTests.elm from the beginning-elm directory in terminal. You should see that all tests have passed. It would be nice if the test output indicated how many times a fuzz test was run. Unfortunately it doesn’t.
Controlling the Range of Values
By default, the int fuzzer generates values between -50 and 50. We can control that by using intRange. Let’s modify addOneTests in FuzzTests.elm one more time so that it’s explicit about the range of values to use when the test is run.
addOneTests : Test
addOneTests =
    describe "addOne"
        [ fuzz (intRange -100 100) "adds 1 to the given integer" <|
            \num ->
                addOne num |> Expect.equal (num + 1)
        ]
Run elm-test tests/FuzzTests.elm once again and you should see that all tests have passed. We can also tell intRange to pick values from the full spectrum of integers. Modify addOneTests in FuzzTests.elm one more time to this:
addOneTests : Test
addOneTests =
    describe "addOne"
        [ fuzz (intRange minInt maxInt) "adds 1 to the given integer" <|
            \num ->
                addOne num |> Expect.equal (num + 1)
        ]
maxInt is a constant defined in the Random module. It represents the maximum value for randomly generated 32-bit ints: 2147483647. minInt is also defined in the Random module and it represents the minimum value for randomly generated 32-bit ints: -2147483648. Before running the test above, we need to import Random in FuzzTests.elm.
module FuzzTests exposing (addOneTests, addTests)
.
.
import Random exposing (maxInt, minInt)
Now if you run elm-test tests/FuzzTests.elm once again, you should see that all tests have passed.
Controlling the Frequency of Values
Here’s an experiment you can run when you see your friends, the next time. Ask each one of them to pick a random number between 1 and 10. You’ll realize that most of them will pick 7, and very few will pick 1, 5, and 10. They also tend to pick numbers between 5 and 10 more often than the numbers between 1 and 5.
Let’s create a fuzzer that simulates this somewhat predictable behavior of your friends. We’ll use the following probabilities for each number between 1 and 10.

Add the following code to the bottom of FuzzTests.elm.
frequencyFuzzer : Fuzzer Int
frequencyFuzzer =
    frequency
        [ ( 70, constant 7 )
        , ( 12, intRange 8 9 )
        , ( 6, constant 6 )
        , ( 9, intRange 2 4 )
        , ( 1, constant 5 )
        , ( 1, constant 1 )
        , ( 1, constant 10 )
        ]
We used the frequency fuzzer to assign probabilities to values between 1 and 10 per the table above. Here is how its type signature looks:
frequency : List (Float, Fuzzer a) -> Fuzzer aIt takes a list of tuples as its only argument. The first element of that tuple represents a probabilistic weight and the second element represents an actual fuzzer responsible for generating random values. We already know what intRange does. The constant fuzzer always generates the given value no matter what.
frequency isn’t guaranteed to generate a valid fuzzer. If any one of the following conditions is met, it’ll return an invalid fuzzer in which case the test simply fails.
- The list of frequencies is empty.
- Any one of the weights is less than
0. - The sum of all weights is
0.
Let’s rewrite addOneTests in FuzzTests.elm to use frequencyFuzzer.
addOneTests : Test
addOneTests =
    describe "addOne"
        [ fuzz frequencyFuzzer "adds 1 to the given integer" <|
            \num ->
                addOne num |> Expect.equal (num + 1)
        ]
Run elm-test tests/FuzzTests.elm from the beginning-elm directory in terminal and you should see that all tests have passed.
So far we’ve only covered the int, intRange, constant, and frequency fuzzers. Let’s go through some of the other fuzzers the Fuzz module provides for generating values of different built-in Elm types.
Bool Fuzzer
The boolfuzzer generates values of Bool type: True and False. Add the following code to the bottom of FuzzTests.elm.
flip : Bool -> Bool
flip x =
    not x


flipTests : Test
flipTests =
    describe "flip"
        [ fuzz bool "negates the given boolean value" <|
            \value ->
                flip value |> Expect.equal (not value)
        ]
And expose flipTests in the module definition.
module FuzzTests exposing (addOneTests, addTests, flipTests)Now run elm-test tests/FuzzTests.elm from the beginning-elm directory in terminal and you should see that all tests have passed.
Float Fuzzer
The float fuzzer is very similar to int. By default, it generates random Float values between -50 and 50. Since fuzz tests are especially useful for tracking down obscure bugs caused by unexpected inputs such as 0, the float fuzzer makes sure to include those inputs. Add the following code to the bottom of FuzzTests.elm.
multiplyFloat : Float -> Int -> Float
multiplyFloat x y =
    x * toFloat y


multiplyFloatTests : Test
multiplyFloatTests =
    describe "multiplyFloat"
        [ fuzz2 float int "multiplies given numbers" <|
            \x y ->
                multiplyFloat x y
                    |> Expect.equal (x * toFloat y)
        ]
And expose multiplyFloatTests in the module definition.
module FuzzTests exposing
    ( addOneTests
    , addTests
    , flipTests
    , multiplyFloatTests
    )
multiplyFloatTests combines two different fuzzers: float and int. Since it’s common for Elm functions to take inputs of different types, we often end up combining different types of fuzzers in our tests.
Notice how we’ve pretty much duplicated the logic inside the multiplyFloat function in our test. For a simple function, we often end up copying the implementation to the test. As our function’s complexity grows, we’ll have to be more creative about defining properties we want to test instead of copying the entire function to our test module.
Run elm-test tests/FuzzTests.elm from the beginning-elm directory in terminal and you should see the following error.
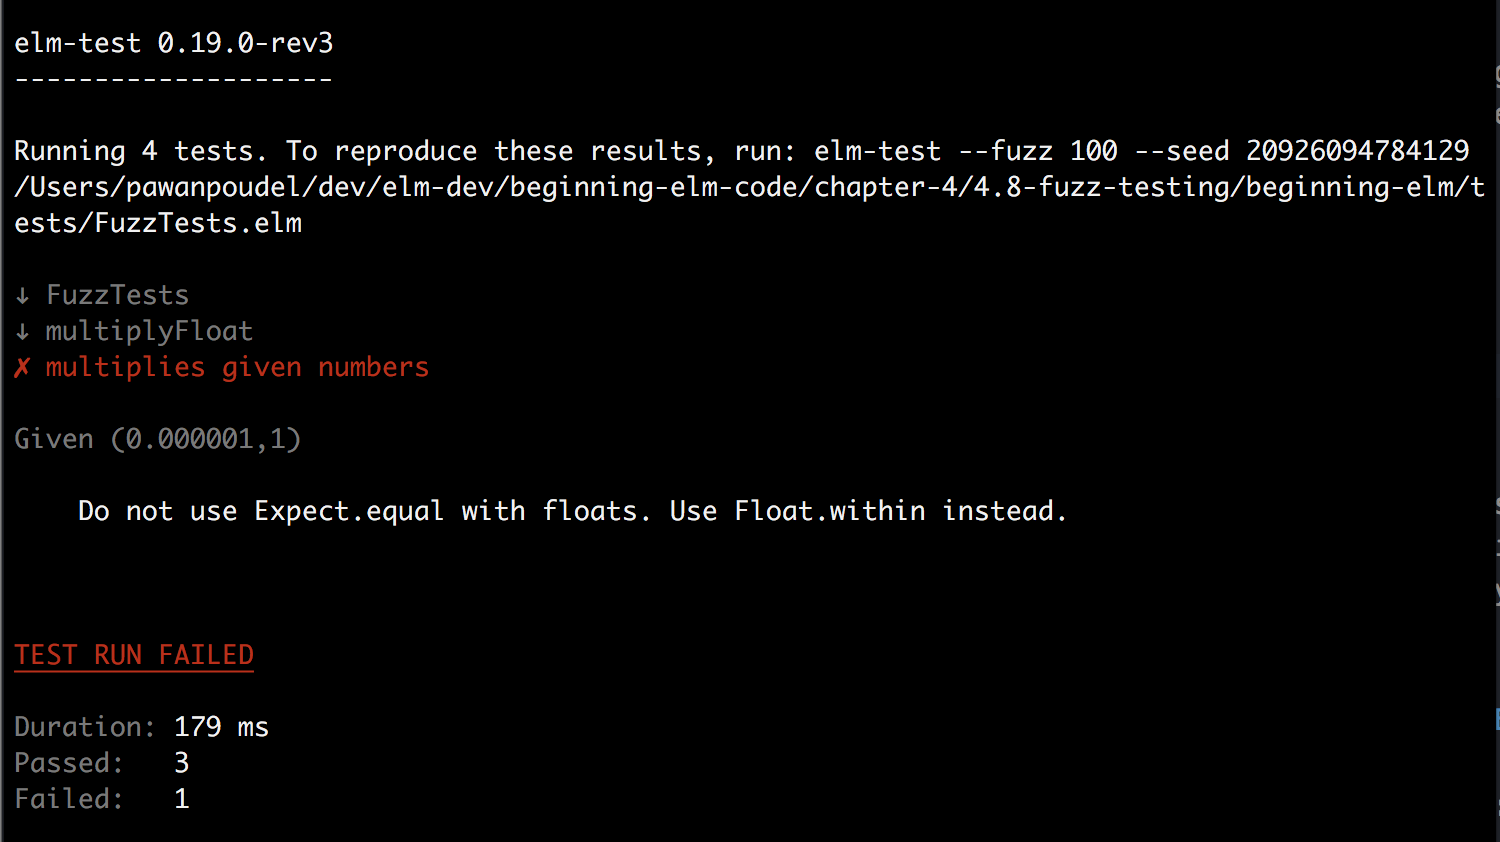
What the error is trying to say is that floating-point arithmetic, by its nature, is tricky and may introduce minor inaccuracies. Therefore, we should use the Expect.within function, which is better suited for verifying calculations involving floats.
Note: The output actually recommends using the Float.within function. It’s a typo. It meant to say Expect.within.
Let’s rewrite multiplyFloatTests in FuzzTests.elm using Expect.within.
multiplyFloatTests : Test
multiplyFloatTests =
    describe "multiplyFloat"
        [ fuzz2 float int "multiplies given numbers" <|
            \x y ->
                multiplyFloat x y
                    |> Expect.within (Absolute 0.000000001) (x * toFloat y)
        ]
Here is how the Expect.within function’s type signature compares with that of Expect.equal.

The FloatingPointTolerance type is defined like this:
type FloatingPointTolerance
    = Absolute Float
    | Relative Float
    | AbsoluteOrRelative Float Float
By using Absolute 0.000000001 in multiplyFloatTests, we’re telling elm-test to pass the test as long as the actual value is within 0.000000001 of the expected value. The error message above shows that elm-test passed 0.000001 and 1 as inputs to the fuzz test inside multiplyFloatTests.
Given (0.000001, 1)When we multiply those two numbers the result is 0.000001 which is within the specified limit, so the test should pass. Let’s expose FloatingPointTolerance in FuzzTests.elm and run elm-test tests/FuzzTests.elm from the beginning-elm directory in terminal. You should see that all tests have passed now.
module FuzzTests exposing
.
.
import Expect exposing (Expectation, FloatingPointTolerance(..))
Note: For more information on floating-point comparison, check out the official documentation.
The float fuzzer will never produce these values defined in the IEEE Standard for Floating-Point Arithmetic (IEEE 754): NaN, -Infinity, and Infinity.
NaN
NaN stands for “not a number.” When a computation results into a floating-point value that’s unrepresentable, Elm presents us with NaN. Here are some examples:
> 0 / 0
NaN : Float

> sqrt -5
NaN : Float
The Basics module defines a function called isNaN for checking whether the result of a computation is indeed NaN.
> isNaN (0 / 0)
True : Bool

> isNaN (sqrt -5)
True : Bool
Infinity and -Infinity
Infinity and -Infinity represent numbers greater than any countable numbers. They aren’t just huge numbers. They’re in fact never-ending numbers. Here are some examples:
> 1 / 0
Infinity : Float

> -1 / 0
-Infinity : Float
The Basics module also provides a function called isInfinite for checking whether a given computation results in infinity.
> isInfinite (1 / 0)
True : Bool

> isInfinite (0 / 0)
False : Bool

> googol = 10 ^ 100
1.0000000000000002e+100 : number

> isInfinite googol
False : Bool
A Googol is a number so big that it’s bigger than the total number of elementary particles present in the known universe. And even that’s not considered an infinite number. Notice how 0 / 0 isn’t treated as Infinity? That’s because it’s NaN which is different from Infinity.
Controlling the Range of Float Values
Like intRange, we can also control the range of float values by using the floatRange fuzzer. Modify multiplyFloatTests in FuzzTests.elm so that it uses floatRange instead.
multiplyFloatTests : Test
multiplyFloatTests =
    describe "multiplyFloat"
        [ fuzz2 (floatRange -1.0 1.0) int "multiplies given numbers" <|
            \x y ->
                multiplyFloat x y
                    |> Expect.within (Absolute 0.000000001) (x * toFloat y)
        ]
Run elm-test tests/FuzzTests.elm from the beginning-elm directory in terminal and you should see that all tests have passed.
Percentage Fuzzer
The percentage fuzzer generates float values between 0.0 and 1.0. It generates zero and one about 10% of the time. Add the following code to the bottom of FuzzTests.elm.
pizzaLeft : Float -> Float -> Float
pizzaLeft eatenPercent totalSlices =
    totalSlices - (eatenPercent * totalSlices)


pizzaLeftTests : Test
pizzaLeftTests =
    describe "pizzaLeft"
        [ fuzz2 percentage float "returns remaining pizza slices" <|
            \eaten total ->
                pizzaLeft eaten total
                    |> Expect.within (Absolute 0.000000001) (total - (eaten * total))
        ]
And expose pizzaLeftTests in the module definition.
module FuzzTests exposing
    .
    .
    , pizzaLeftTests
    )
Now run elm-test tests/FuzzTests.elm once again and you should see that all tests have passed.
String Fuzzer
The string fuzzer generates random printable ASCII string values consisting of up to 1000 characters. Since we often forget to handle edge cases containing the empty string, the string fuzzer makes sure that it’s one of the generated values.
The official documentation for the elm-test package has a nice example that uses the string fuzzer. We’ll just borrow it here. Add the following tests to the bottom of FuzzTests.elm.
stringTests : Test
stringTests =
    describe "The String module"
        [ describe "String.reverse"
            [ test "has no effect on a palindrome" <|
                -- Unit Test - 1
                \_ ->
                    let
                        palindrome =
                            "hannah"
                    in
                    palindrome
                        |> String.reverse
                        |> Expect.equal palindrome
            , test "reverses a known string" <|
                -- Unit Test - 2
                \_ ->
                    "ABCDEFG"
                        |> String.reverse
                        |> Expect.equal "GFEDCBA"
            , fuzz string "restores the original string if you run it again" <|
                -- Fuzz Test
                \randomlyGeneratedString ->
                    randomlyGeneratedString
                        |> String.reverse
                        |> String.reverse
                        |> Expect.equal randomlyGeneratedString
            ]
        ]
And expose stringTests in the module definition.
module FuzzTests exposing
    .
    .
    , stringTests
    )
Notice how stringTests supplements a fuzz test with two unit tests. The first unit test verifies that an edge case for reversing a palindrome works as expected. The second unit test makes it clear what the String.reverse function does. Unit tests like these can provide a good documentation of how our code should behave and prevent regressions.
- Regression
- “The reappearance of a bug in a piece of software that had previously been fixed.” - Wikitionary
Run elm-test tests/FuzzTests.elm from the beginning-elm directory in terminal and you should see that all tests have passed.
List Fuzzer
The list fuzzer generates a list of random values of given type. Let’s say we want to verify that the List.length function never returns a negative value. Add the following test to the bottom of FuzzTests.elm.
listLengthTests : Test
listLengthTests =
    describe "List.length"
        [ fuzz (list int) "never returns a negative value" <|
            \intList ->
                intList
                    |> List.length
                    |> Expect.atLeast 0
        ]
And expose listLengthTests in the module definition.
module FuzzTests exposing
    .
    .
    , listLengthTests
    )
This is the first time we’ve seen a fuzzer that takes another fuzzer as an argument. Let’s look at the list fuzzer’s type signature to understand how it works.

Like intRange and floatRange, the list fuzzer and its argument must be surrounded by parentheses. Otherwise, Elm thinks we’re passing two different fuzzers to the fuzz function which takes only one. Although list and int are two different types of fuzzers, the expression (list int) returns just one.
Run elm-test tests/FuzzTests.elm from the beginning-elm directory in terminal and you should see that all tests have passed.
Array Fuzzer
Like list, the array fuzzer generates an array of random values of given type. It’s type signature also looks very similar to that of list.
array : Fuzzer a -> Fuzzer (Array a)Let’s write a test to verify the Array.get function always returns Nothing when we access an index that’s out of range. Add the following test to the bottom of FuzzTests.elm.
arrayGetTests : Test
arrayGetTests =
    describe "Array.get"
        [ fuzz (array (intRange -20 20)) "returns Nothing for out of range index" <|
            \intArray ->
                let
                    length =
                        Array.length intArray
                in
                intArray
                    |> Array.get length
                    |> Expect.equal Nothing
        ]
And expose arrayGetTests in the module definition. Also import the Array module.
module FuzzTests exposing
    .
    .
    , arrayGetTests
    )
.
.
import Array
Run elm-test tests/FuzzTests.elm from the beginning-elm directory in terminal and you should see that all tests have passed.
We asked the array fuzzer to generate random arrays of ints between -20 and 20. We then computed the generated array’s length and used it as an index. When we use the length as an index, it’s guaranteed to be out of range because in Elm the array indices start at 0. Run elm repl from the beginning-elm directory and execute the following code.
> import Array

> myArray = Array.fromList [ 1, 2, 3 ]
Array.fromList [1,2,3]
    : Array.Array number

> Array.get 2 myArray
Just 3 : Maybe number

> length = Array.length myArray
3 : Int

> Array.get length myArray
Nothing : Maybe number
Tuple Fuzzer
The tuple fuzzer generates a tuple of random values of given types. Let’s examine its type signature to understand how it works.

The tuple fuzzer takes a tuple of two individual fuzzers as the first argument. If it were to accept the two fuzzers as separate arguments, its type signature would instead be this:
tuple : Fuzzer a -> Fuzzer b -> Fuzzer (a, b)Modify addTests in FuzzTests.elm to use the tuple fuzzer.
addTests : Test
addTests =
    describe "add"
        [ fuzz (tuple ( int, int )) "adds two given integers" <|
            \( num1, num2 ) ->
                add num1 num2
                    |> Expect.equal (num1 + num2)
        ]
Here’s how addTests looked before:
addTests : Test
addTests =
    describe "add"
        [ fuzz2 int int "adds two given integers" <|
            \num1 num2 ->
                add num1 num2
                    |> Expect.equal (num1 + num2)
        ]
The previous version looked a bit cleaner, didn’t it? That’s because fuzz2 is a convenience function for writing tests that use tuple fuzzers in a more elegant way. Let’s write one more test for revealing the ugliness inherent in the tuple fuzzer. Add the following test to the bottom of FuzzTests.elm.
listReverseTests : Test
listReverseTests =
    describe "List.reverse"
        [ fuzz (tuple ( (list int), int )) "doesn't remove a member of the list" <|
            \( intList, num ) ->
                intList
                    |> List.reverse
                    |> List.member num
                    |> Expect.equal (List.member num intList)
        ]
This test verifies that the List.reverse function doesn’t remove a member of the list. Look how confusing the part after fuzz looks with all those parentheses. We can make it easier to read by using fuzz2 instead.
listReverseTests : Test
listReverseTests =
    describe "List.reverse"
        [ fuzz2 (list int) int "doesn't remove a member of the list" <|
            \intList num ->
                intList
                    |> List.reverse
                    |> List.member num
                    |> Expect.equal (List.member num intList)
        ]
Expose listReverseTests in the module definition.
module FuzzTests exposing
    .
    .
    , listReverseTests
    )
Now run elm-test tests/FuzzTests.elm from the beginning-elm directory in terminal and you should see that all tests have passed. As it turns out, the fuzz3 function we saw earlier is also a convenience function like fuzz2 for simplifying the tupple fuzzer syntax.
fuzz3 :
    Fuzzer a
    -> Fuzzer b
    -> Fuzzer c
    -> String
    -> (a -> b -> c -> Expectation)
    -> Test


tuple3
    : (Fuzzer a, Fuzzer b, Fuzzer c)
    -> Fuzzer (a, b, c)
Exercise 4.8.1
In the Recursive Types section, we wrote a function for computing the sum of all the nodes contained in a list of type MyList.
sum : MyList Int -> Int
sum myList =
    case myList of
        Empty ->
            0

        Node intValue remainingNodes ->
            intValue + sum remainingNodes
See if you can verify that this function works as expected by writing some fuzz tests.
Testing rippleCarryAdder
Now that we know how fuzz testing works, let’s turn our attention to the rippleCarryAdder function. Back in the Easy to Test section, we wrote four unit tests that covered the boundary cases and one more test to communicate what rippleCarryAdder actually does.
rippleCarryAdderTests : Test
rippleCarryAdderTests =
    describe "4-bit ripple carry adder"
        [ describe "given two binary numbers and a carry-in digit"
            [ test "returns the sum of those numbers and a carry-out digit" <|
                \_ ->
                    rippleCarryAdder 1001 1101 1
                        |> Expect.equal 10111
            ]
        , describe "when the 1st input is 1111, and the 2nd input is 1111"
            [ test "and carry-in is 0, the output is 11110" <|
                \_ ->
                    rippleCarryAdder 1111 1111 0
                        |> Expect.equal 11110
            , test "and carry-in is 1, the output is 11111" <|
                \_ ->
                    rippleCarryAdder 1111 1111 1
                        |> Expect.equal 11111
            ]
        , describe "when the 1st input is 0000, and the 2nd input is 0000"
            [ test "and carry-in is 0, the output is 0000" <|
                \_ ->
                    rippleCarryAdder 0 0 0
                        |> Expect.equal 0
            , test "and carry-in is 1, the output is 0001" <|
                \_ ->
                    rippleCarryAdder 0 0 1
                        |> Expect.equal 1
            ]
        ]
As mentioned earlier, the rippleCarryAdder function has nine input signals which result into 2 ^ 9 = 512 different input scenarios. In the Easy to Test section, we quickly realized that it wasn’t feasible to use unit tests to cover all of those scenarios. How about fuzz tests? Let’s see what they look like.
rippleCarryAdderFuzzTests : Test
rippleCarryAdderFuzzTests =
    describe "Fuzz tests"
        [ fuzz3
            (intRange 0 1111)
            (intRange 0 1111)
            (intRange 0 1)
            "fuzz tests for ripple carry adder" <|
            \a b carryIn ->
                rippleCarryAdder a b carryIn
                    |> Expect.equal ...
        ]
The code above shows a rough outline of a fuzz test that attempts to cover all 512 scenarios, but it quickly runs into a big problem: How to test the rippleCarryAdder function without duplicating the logic in its entirely?
So far we’ve used fuzz tests to verify trivial functions by duplicating the logic in tests. It doesn’t make sense to do the same with the rippleCarryAdder function. We need to step back and ask ourselves what our goal here is. It certainly isn’t to test every single input scenario. We should instead think of general properties our function satisfies and use fuzz tests to verify that those properties do hold true for a wide variety of inputs.
Quote: “Being proud of 100% test coverage is like being proud of reading every word in the newspaper. Some are more important than others.” - Kent Beck
Listed below are some of the properties we can test for rippleCarryAdder.
Property #1: If the most significant digits of both inputs are 0, the carry-out digit will always be 0 regardless of what the carry-in digit is.

Property #2: If the most significant digits of both inputs are 1, the carry-out digit will always be 1 regardless of what the carry-in digit is.

Property #3: If the least significant digits of both inputs are 0 and the carry-in digit is also 0, the least significant digit of the output will always be 0.

Property #4: If the least significant digits of both inputs are 1 and the carry-in digit is 0, the least significant digit will always be 0.

Testing Property #1
Let’s begin our testing with property #1. Add the following test to the bottom of RippleCarryAdderTests.elm located inside beginning-elm/tests.
rippleCarryAdderProperty1 : Test
rippleCarryAdderProperty1 =
    describe "carry-out's relationship with most significant digits"
        [ fuzz3
            (list (intRange 0 1))
            (list (intRange 0 1))
            (intRange 0 1)
            "carry-out is 0 when most significant digits are both 0" <|
            \list1 list2 carryIn ->
                let
                    convertToBinary digitsList =
                        digitsList
                            |> List.take 3
                            |> numberFromDigits

                    firstInput =
                        convertToBinary list1

                    secondInput =
                        convertToBinary list2
                in
                rippleCarryAdder firstInput secondInput carryIn
                    |> digits
                    |> List.length
                    |> Expect.lessThan 5
        ]
And expose rippleCarryAdderProperty1 in the module definition.
module RippleCarryAdderTests exposing
    .
    .
    , rippleCarryAdderProperty1
    )
Generating Input Values
As of this writing, Elm doesn’t provide a fuzzer for generating binary numbers. We could write a custom fuzzer for that, but that’s an advanced topic requiring a lot of explaining. We’ll instead settle for generating a list of binary digits and turn them into a binary number. Here are some examples of the lists generated by the (list (intRange 0 1)) fuzzer:
[ ]
[ 0 ]
[ 1 ]
[ 0, 1]
[ 1, 0, 1]
[ 1, 1, 0, 1, 1]
[ 1, 0, 1, 1, 1, 0, 1]
.
.
We then use the convertToBinary function to convert these lists into binary numbers.
convertToBinary digitsList =
    digitsList
        |> List.take 3
        |> numberFromDigits
The rippleCarryAdder function takes binary numbers that have at most four digits.
> rippleCarryAdder 1001 1100 0
10101
Unfortunately, there’s no easy way to limit the length of lists generated by (list (intRange 0 1)) to four. But we can use the List.take function to extract the first four elements from a list.
In the convertToBinary function, we’re actually extracting only three because property #1 requires the most significant digits of both input numbers to be 0 and rippleCarryAdder treats a list with only three elements as a binary number with four digits whose most significant digit is 0. So [ 1, 0, 1 ] is equivalent to 0101.
Next we use the numberFromDigits function to convert a list of digits into an actual binary number.
numberFromDigits : List Int -> Int
numberFromDigits digitsList =
    List.foldl (\digit number -> digit + 10 * number) 0 digitsList
We wrote this function back in the Solving Complex Problems with Simple Functions section. If you don’t remember how it works, go ahead and refresh your memory by re-reading that section. To be able to access numberFromDigits from RippleCarryAdderTests.elm, we need to first expose it in src/RippleCarryAdder.elm. Let’s do that.
module RippleCarryAdder exposing
    .
    .
    , numberFromDigits
    )
As far as generating the carry-in digit is concerned, all we need is the intRange fuzzer with a range from 0 to 1 because the carry-in digit can only be either 0 or 1.
Private Functions
It’s generally a bad practice to reach into private functions such as numberFromDigits from our tests. At the moment, it’s technically a public function because we just exposed it from the RippleCarryAdder module. Ideally, we should only expose functions that are meant to be public, but how do we know which functions should be public and which ones should be private?
The RippleCarryAdder module contains a dozen functions, but if we look closely we realize that there’s only one function that’s responsible for computing a sum of two 4-bit binary numbers, and that function is rippleCarryAdder. All other functions are there to assist rippleCarryAdder. Therefore, the rippleCarryAdder function is the only one that needs to be public.
One obvious question is, why do we need to split the functionality into multiple functions as we’ve done in the RippleCarryAdder module? Can’t we consolidate all helper functions into rippleCarryAdder since it’s the only function the outside world cares about anyway?
The answer to that question is, creating one giant function that does everything turns out to be quite hard to maintain in the long run. It’s difficult to figure out what the function is supposed to do when it’s that big. Just take a look at the following code that attempts to consolidate all helper functions into rippleCarryAdder.
rippleCarryAdder a b carryIn =
    let
        halfAdder a b =
            let
                d =
                    Bitwise.and a b

                e =
                    Bitwise.or a b
                        |> (case a of
                                0 ->
                                    1

                                1 ->
                                    0

                                _ ->
                                    -1
                           )

                sumDigit =
                    Bitwise.and d e

                carryOut =
                    Bitwise.and a b
            in
            { carry = carryOut
            , sum = sumDigit
            }

        fullAdder a b carryIn =
            let
                firstResult =
                    halfAdder b carryIn

                secondResult =
                    halfAdder a firstResult.sum

                finalCarry =
                    orGate firstResult.carry secondResult.carry
            in
            { carry = finalCarry
            , sum = secondResult.sum
            }

        extractDigits number =
            digits number
                |> padZeros 4
                |> Array.fromList
                |> arrayToRecord

        stringToInt string =
            String.toInt string
                |> Maybe.withDefault -1

        arrayToRecord array =
            let
                firstElement =
                    Array.get 0 array
                        |> Maybe.withDefault -1

                secondElement =
                    Array.get 1 array
                        |> Maybe.withDefault -1

                thirdElement =
                    Array.get 2 array
                        |> Maybe.withDefault -1

                fourthElement =
                    Array.get 3 array
                        |> Maybe.withDefault -1
            in
            { d0 = firstElement
            , d1 = secondElement
            , d2 = thirdElement
            , d3 = fourthElement
            }

        numberFromDigits digitsList =
            List.foldl (\digit number -> digit + 10 * number) 0 digitsList

        digits number =
            let
                getDigits n =
                    if n == 0 then
                        []

                    else
                        remainderBy 10 n :: getDigits (n // 10)
            in
            getDigits number
                |> List.reverse

        padZeros total list =
            let
                numberOfZeros =
                    total - List.length list
            in
            List.repeat numberOfZeros 0 ++ list

        -- Extract digits
        firstSignal =
            extractDigits a

        secondSignal =
            extractDigits b

        -- Compute sum and carry-out
        firstResult =
            fullAdder firstSignal.d3 secondSignal.d3 carryIn

        secondResult =
            fullAdder firstSignal.d2 secondSignal.d2 firstResult.carry

        thirdResult =
            fullAdder firstSignal.d1 secondSignal.d1 secondResult.carry

        finalResult =
            fullAdder firstSignal.d0 secondSignal.d0 thirdResult.carry
    in
    [ finalResult, thirdResult, secondResult, firstResult ]
        |> List.map .sum
        |> (::) finalResult.carry
        |> numberFromDigits
Someone who is reading this code for the first time will find it quite difficult to understand how the rippleCarryAdder function is supposed to work. There’s too much going on. But, if we extract a few functions out, give them proper names, and add a little structure to the overall code, it becomes much easier to capture the intent of the rippleCarryAdder function in just eighteen lines as shown below.
rippleCarryAdder a b carryIn =
    let
        -- Extract digits
        firstSignal =
            extractDigits a

        secondSignal =
            extractDigits b

        -- Compute sum and carry-out
        firstResult =
            fullAdder firstSignal.d3 secondSignal.d3 carryIn

        secondResult =
            fullAdder firstSignal.d2 secondSignal.d2 firstResult.carry

        thirdResult =
            fullAdder firstSignal.d1 secondSignal.d1 secondResult.carry

        finalResult =
            fullAdder firstSignal.d0 secondSignal.d0 thirdResult.carry
    in
    [ finalResult, thirdResult, secondResult, firstResult ]
        |> List.map .sum
        |> (::) finalResult.carry
        |> numberFromDigits
Another maintenance problem big functions create is lack of reusability. Big functions tend to do too many things. This makes it hard to reuse the logic inside them somewhere else in the module. This results in code duplication which is also bad.
Now that we know why we shouldn’t write long functions, let’s get back to the previous discussion of which functions should be public and which ones should be private.
Generally speaking, helper functions that are used only inside the module they are defined in should be made private. If we follow that guideline, the andGate, orGate, inverter, halfAdder, and fullAdder functions should also be private and we won’t be able to access them from our tests included in the RippleCarryAdderTests.elm file. We wrote those tests as a learning exercise, but in a real project, it’s not necessary to test private functions like andGate for two reasons:
-
First, they are hidden inside public functions and their results cannot be seen by the code outside of the module they are defined in. Private functions are invoked by public functions that should already have tests. So if we do introduce a bug in a private function, it should be caught by one of the public functions’ tests.
-
Second, private functions tend to be more unstable compared to public functions. Once a function is made public, it can be very risky to change it. If we modify its interface, the client code using that function could stop working. That’s why we need to make public functions as stable as possible. But if a function is private, we don’t have to put a lot of effort into refining its interface. We can always come back and refactor it without the fear of breaking some code out there. Because of this, private functions tend to change a lot more than public functions. So if we write tests for a private function, we might have to change those tests every time that function’s structure has changed even if the underlying behavior hasn’t.
Since you already know how to make functions private in Elm from the Easier Code Organization section, making the numberFromDigits function private is left as an exercise. If you do end up making numberFromDigits private, you won’t be able to access it from the RippleCarryAdderTests module.
You can solve this problem either by copying the function into the test module itself or by creating a new module that’s shared between RippleCarryAdder and RippleCarryAdderTests. It’s fine to duplicate a function or two from the production code into a test file. But if you need to reuse multiple functions, the latter approach is better from maintenance standpoint.
Verifying Output
Now that we’ve successfully generated and transformed the inputs required by property #1, let’s discuss the output.
rippleCarryAdder firstInput secondInput carryIn
    |> digits
    |> List.length
    |> Expect.lessThan 5
Property #1 requires that the carry-out digit must be 0. To verify this requirement, we need to make sure that there are only four digits in the output generated by the rippleCarryAdder function. That’s because if the carry-out digit is 0, rippleCarryAdder returns a binary number with only four digits.
> rippleCarryAdder 1001 0011 0
1100
But if the carry-out digit is 1, it returns a binary number with five digits.
> rippleCarryAdder 1101 1110 0
11011
To find out how many digits are in a number, we need to first convert it to a list. The digits function does exactly that.
digits number =
    let
        getDigits n =
            if n == 0 then
                []

            else
                remainderBy 10 n :: getDigits (n // 10)
    in
    getDigits number
        |> List.reverse
This function was also created back in the Solving Complex Problems with Simple Functions section. Finally, we used Expect.equal to assert that the length of the output list containing individual digits is less than 5.
To execute the tests in rippleCarryAdderProperty1, run elm-test tests/RippleCarryAdderTests.elm from the beginning-elm directory in terminal. All tests should pass.
Exercise 4.8.2
Property #2 is very similar to property #1. See if you can write a fuzz test to make sure it too holds true for a wide variety of inputs.
Testing Property #3
Next, we’ll verify property #3 also holds true. Here is what that property says: if the least significant digits of both inputs are 0 and the carry-in digit is also 0, the least significant digit of the output will always be 0. Add the following test to the bottom of RippleCarryAdderTests.elm.
rippleCarryAdderProperty3 : Test
rippleCarryAdderProperty3 =
    describe "carry-in's relationship with least significant digits"
        [ fuzz3
            (list (intRange 0 1))
            (list (intRange 0 1))
            (constant 0)
            """
            the least significant digit of the output is 0 when the
            carry-in is 0 and the least significant digits of both
            inputs are 0
            """ <|
            \list1 list2 carryIn ->
                let
                    firstInput =
                        convertToBinary list1

                    secondInput =
                        convertToBinary list2

                    convertToBinary digitsList =
                        digitsList
                            |> List.take 4
                            |> setLastDigitToZero
                            |> numberFromDigits

                    setLastDigitToZero digitsList =
                        Array.fromList digitsList
                            |> Array.set (lastIndex digitsList) 0
                            |> Array.toList

                    lastIndex digitsList =
                        List.length digitsList - 1

                    isLastDigitZero digitsList =
                        Array.fromList digitsList
                            |> Array.get (lastIndex digitsList)
                            |> Maybe.withDefault 0
                            |> (==) 0
                in
                rippleCarryAdder firstInput secondInput carryIn
                    |> digits
                    |> isLastDigitZero
                    |> Expect.equal True
        ]
And expose rippleCarryAdderProperty3 in the module definition.
module RippleCarryAdderTests exposing
    .
    .
    , rippleCarryAdderProperty3
    )
The (list (intRange 0 1)) fuzzer used here for generating random lists of binary digits is the same as the one used in rippleCarryAdderProperty1. Since this property is a bit more complicated than property #1, we need to apply a few more transformations before we arrive at the inputs we need.
The convertToBinary function extracts four digits from a random list; sets the last digit to zero; and converts the list of digits into a binary number.
convertToBinary digitsList =
    digitsList
        |> List.take 4
        |> setLastDigitToZero
        |> numberFromDigits
We used the constant fuzzer to make sure that the carry-in digit is always 0. This fuzzer generates only the specified value no matter what. Also, this is the first time we used a multi-line string to describe a test. Generally speaking, you should keep the description short, but don’t hesitate to use more words if you can’t distill the essence of your test into a short sentence.
Finally, to verify the output, we converted the binary number into a list of digits and checked whether the last digit is 0 or not.
rippleCarryAdder firstInput secondInput carryIn
    |> digits
    |> isLastDigitZero
    |> Expect.equal True
Before we can run the tests in rippleCarryAdderProperty3, we need to import the Array module in RippleCarryAdderTests.elm.
module RippleCarryAdderTests exposing
.
.
import Array
Now run elm-test tests/RippleCarryAdderTests.elm from the beginning-elm directory in terminal and you should see that all tests have passed.
Exercise 4.8.3
Property #4 is also very similar to property #3. See if you can write a fuzz test to verify the rippleCarryAdder function exhibits that property.
Summary
We covered quite a bit of ground — from learning how to write simple fuzz tests to verifying general properties of a complex function. Don’t worry if you aren’t yet comfortable figuring out which properties to test for in your code.
Identifying properties for testing is quite hard, even for experienced programmers. That’s why fuzz tests are generally more difficult to write than unit tests, especially if a function logic is complex. Identifying a few individual input scenarios isn’t enough. We need to think hard about the properties that must hold true for a wide variety of inputs. The only way to get better at it is through practice. So next time you write some code of your own, try to identify a few properties and use fuzz tests to verify that your code does satisfy them.
The Fuzz module contains a lot more fuzzers than what we covered in this section. You can learn all about them here.