In Fetching Data Using GET, we learned how to retrieve a simple string from an HTTP server. Nowadays most client apps expect servers to send data in JSON format. In this section, we’ll change the format of our server’s response from string to JSON and use various functions in Elm to translate that JSON to Elm values.
Creating a Local JSON Server
The local HTTP server we created in the previous section is capable of sending JSON too. All we need to do is structure our data as JSON instead of a regular string like this:

But there is a better way. We can create a different server that is fine-tuned for serving JSON instead of static files by using the NPM package called json-server. Go ahead and install it globally using the -g option so that it can be run from anywhere in the terminal.
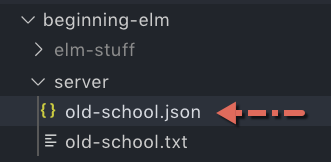
$ npm install json-server -gNow create a new file called old-school.json inside beginning-elm/server.
Add the following JSON to the old-school.json file.
{
    "nicknames" : ["The Godfather", "The Tank", "Beanie", "Cheese"]
}
Let’s fire up a JSON server by running the following command from the beginning-elm directory in terminal. You can stop the HTTP server we created in the Fetching Data Using GET section if it’s still running by pressing Ctrl + c.
$ json-server --watch server/old-school.json -p 5019You should see an output like this:
\{^_^}/ hi!

Loading server/old-school.json
Done

Resources
http://localhost:5019/nicknames

Home
http://localhost:5019

Type s + enter at any time to create a snapshot of the database
Watching...
Like http-server, json-server requires us to specify a file from which it will serve data. In our case it’s server/old-school.json. The --watch option tells the server to watch for any changes made to old-school.json. If we don’t use this option, we’ll have to restart the server each time that file is modified. The -p option specifies the port. We are using a different port (5019) here to avoid any conflict with the server we created in the Fetching Data Using GET section in case it’s still running.
Go to http://localhost:5019/nicknames in your browser. If you see a list of nicknames as shown below then the server is working as expected.
[
  "The Godfather",
  "The Tank",
  "Beanie",
  "Cheese"
]
Notice how the URL to retrieve nicknames has changed from what it used to be in the Fetching Data Using GET section:
- New URL with
json-server:http://localhost:5019/nicknames - Old URL with
http-server:http://localhost:5016/old-school.txt
With the old URL we were specifying the filename because it was serving the contents of a static file. The new URL specifies which resource we want to retrieve. Rather than serving the entire content of a file, json-server allows us to define resources which are just a way to name a piece of information. By adding the following JSON to the old-school.json file, we’re assigning the name nicknames to the resource ["The Godfather", "The Tank", "Beanie", "Cheese"].
{
    "nicknames" : ["The Godfather", "The Tank", "Beanie", "Cheese"]
}
Resources can be a lot more complex than just a list of strings. Here is an example derived from json-server’s documentation page:
{
  "posts": [
    {
      "id": 1,
      "title": "json-server",
      "author": "typicode"
    },
    {
      "id": 2,
      "title": "http-server",
      "author": "indexzero"
    }
  ],
  "comments": [
    {
      "id": 1,
      "body": "some comment",
      "postId": 1
    }
  ],
  "profile": {
    "name": "typicode"
  }
}
The above JSON defines three different resources: posts, comments, and profile. A resource can be either a collection or a single entity. posts and comments are collections, whereas profile is a single entity. Each resource has a unique location from where we can access it.
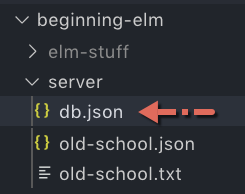
This concept will become clearer if we try to retrieve these resources from a browser. Go ahead and add the above JSON to a new file called db.json in the beginning-elm/server directory. db is short for database.
Now stop the JSON server by pressing Ctrl + c and restart it so that it’ll use the db.json file instead.
$ json-server --watch server/db.json -p 5019Notice how the output lists all available resources.
Resources
http://localhost:5019/posts
http://localhost:5019/comments
http://localhost:5019/profile
json-server has essentially created a REST API for us. Let’s retrieve the posts resource by loading http://localhost:5019/posts in browser. Your output should look like this:
[
  {
    "id": 1,
    "title": "json-server",
    "author": "typicode"
  },
  {
    "id": 2,
    "title": "http-server",
    "author": "indexzero"
  }
]
posts is also a resource itself even though it contains other resources inside it. We can retrieve an individual resource inside posts by specifying an id. If you load the URL http://localhost:5019/posts/1 in browser, you should see only one post.
{
  "id": 1,
  "title": "json-server",
  "author": "typicode"
}
Hopefully, you now understand how json-server works. We really didn’t need to learn all of this just to return some JSON from our server. The good news is all of this knowledge will come handy when we create, update, and delete resources in chapter 7 using the POST, PATCH, and DELETE methods defined in the HTTP protocol.
Retrieving JSON from an Elm App
Let’s turn our attention back to the Elm app we wrote in the Fetching Data Using GET section. In the HttpExamples.elm file located inside beginning-elm/src, we retrieved a string and used the String.split function to extract individual nicknames from that string.
update : Msg -> Model -> ( Model, Cmd Msg )
update msg model =
    case msg of
        SendHttpRequest ->
            ( model, getNicknames )

        DataReceived (Ok nicknamesStr) ->
            let
                nicknames =
                    String.split "," nicknamesStr
            in
            ( { model | nicknames = nicknames }, Cmd.none )
        .
        .
We will have to rewrite some of that logic to fetch nicknames as JSON and decode them. Stop the JSON server by pressing Ctrl + c if it’s running and restart it to use the old-school.json file.
$ json-server --watch server/old-school.json -p 5019The first thing we need to change in HttpExamples.elm is the URL.
url : String
url =
    "http://localhost:5019/nicknames"
The process for retrieving JSON from a server isn’t any different from retrieving a string. Although we’re retrieving JSON, the underlying data format sent by the server is still a raw string. If that’s the case, how does a client app know how to properly parse a response if it always comes down as string? It can’t use the same technique to extract nicknames from a string and also JSON.
Luckily, the server specifies which format it intends the response to be interpreted as through the use of Content-Type header. For JSON, the server uses application/json as the Content-Type header’s value. Whereas, for string it uses text/plain.
Decoding JSON
Elm provides a package called elm/json which includes modules for encoding and decoding JSON values. We installed that package in the Type System section by running the following command.
$ elm install elm/jsonIf you don’t have it installed already, go ahead and run the above command from the beginning-elm directory in terminal. Don’t run it from the same terminal window where we ran json-server earlier. Create a new one. When elm install asks for your permission, answer y. After that import the Json.Decode module in HttpExamples.elm.
module HttpExamples exposing (main)

import Json.Decode exposing (Decoder, Error(..), decodeString, list, string)
.
.
Next we need to define a decoder that knows how to translate JSON into Elm values. Add the following code above the update function in HttpExamples.elm.
nicknamesDecoder : Decoder (List String)
nicknamesDecoder =
    list string
The expression list string creates a decoder that knows how to translate a JSON array into a list of Elm strings. That sounds confusing, doesn’t it? Let’s experiment with this expression in repl to get a better understanding. Run elm repl from the beginning-elm directory in terminal and enter the following code.
> import Json.Decode exposing (..)

> list
<function> : Decoder a -> Decoder (List a)
Look what we got when we entered just list. The output suggests that list is a function that takes a decoder and returns another decoder. Let’s see what we get when we enter string.
> string
<internals> : Decoder String
Note: We were able to type list and string in repl without having to prefix the module name because we exposed everything while importing Json.Decode.
String Decoder
string is a decoder that knows how to translate a JSON string into an Elm string. Here is an example:
> decodeString string "\"Beanie\""
Ok "Beanie" : Result Error String
We used two sets of double quotes to indicate that "\"Beanie\"" contains a JSON string within a raw string. string by itself doesn’t decode JSON. It’s like a recipe for decoding. The decodeString function is the one that does the actual decoding. It first parses the raw string into JSON and then applies the string decoder to translate that JSON into an Elm string.

The following diagram explains the type signature of decodeString in detail.

Json.Decode.Error
When decoding fails, decodeString returns a value of type Error. Here is an example:
> decodeString string "42"
Err (Failure ("Expecting a STRING") <internals>)
    : Result Error String
Note: Although we wrapped 42 in double quotes, it’s not considered a JSON string. For it to be a proper JSON string, we need to add one more set of double quotes like this: "\"42\"".
The Error type is defined in the Json.Decode module like this:
type Error
    = Field String Error
    | Index Int Error
    | OneOf (List Error)
    | Failure String Value
It’s a recursive type. Earlier in the Type System section, we created a recursive type of our own like this:
type MyList a
    = Empty
    | Node a (MyList a)
Do you notice a similarity? Both types provide at least one data constructor that isn’t recursive. Without those data constructors we would end up with a value that never ends. Here’s an example:
Node 16 (Node 5 (Node 31 (Node 9 (Node 18 (Node 7 (Node 26 (...)))))))But why does the Error type have to be so complex? Why can’t it be just a simple string? It actually used to be just a string before Elm 0.19. By making it a more complex type, the authors of the elm/json package have given us the ability to create an elaborate visualization of the problem encountered during the decoding process. For example, we can show the entire JSON object and highlight the part that caused the error in red.
We won’t get into the details of how to do that here, but you may want to explore it further on your own after you have read the Decoding JSON - Part 1 and Decoding JSON - Part 2 sections.
Other Primitive Decoders
Elm provides three other decoders for translating primitive JSON types to Elm values: int, float, and bool. Here are some examples showing them in action:
> decodeString int "9"
Ok 9 : Result Error Int

> decodeString int "2.5"
Err (Failure ("Expecting an INT") <internals>)
    : Result Error Int

> decodeString float "2.5"
Ok 2.5 : Result Error Float

> decodeString bool "true"
Ok True : Result Error Bool

> decodeString bool "false"
Ok False : Result Error Bool

> decodeString bool "87"
Err (Failure ("Expecting a BOOL") <internals>)
    : Result Error Bool
Building Complex Decoders
JSON supports the following data types:
-
string — A string must be written in double quotes and looks very similar to an Elm string.
-
number — A number must be an integer or a float.
-
boolean — A boolean must be either
trueorfalse. -
array — An array can contain any other JSON values including arrays themselves.
-
object — An object consists of key value pairs.
-
null —
nullis used to indicate an absence of a value.
We already know how to decode strings, numbers, and booleans. To decode the rest, we need to create more complex decoders using primitive decoders as building blocks. Let’s start with a JSON array.
List Decoder
Earlier we created a decoder for translating an array of JSON strings into a list of Elm strings.
nicknamesDecoder : Decoder (List String)
nicknamesDecoder =
    list string
We can decode an array of nicknames using list string like this:
> nicknameJson = "[\"The Godfather\", \"The Tank\", \"Beanie\", \"Cheese\"]"
"[\"The Godfather\", \"The Tank\", \"Beanie\", \"Cheese\"]" : String

> decodeString (list string) nicknameJson
Ok ["The Godfather","The Tank","Beanie","Cheese"]
    : Result Error (List String)
Similarly, we can decode an array of JSON ints (or floats) like this:
> decodeString (list int) "[1, 2, 3]"
Ok [1,2,3] : Result Error (List Int)

> decodeString (list float) "[1.5, 2.5]"
Ok [1.5,2.5] : Result Error (List Float)
list itself is not a decoder. It’s a function that takes a decoder and creates a more complex decoder. Here is how its type signature looks:
list : Decoder a -> Decoder (List a)If we want to decode a JSON that contains an array of arrays, we can do that by using the list decoder multiple times like this:
> decodeString (list (list int)) "[[1, 2], [4, 5]]"
Ok [[1,2],[4,5]]
    : Result Error (List (List Int))
There is no limit to how deep this nesting can go. It’s important to remember that Elm requires all elements in a List to be of the same type. Therefore, we can’t decode a JSON array with different types.
> decodeString (list (list int)) "[[1, 2], [3.5, 4.5]]"
Err (Index 1 (Index 0 (Failure ("Expecting an INT") <internals>)))
    : Result Error (List (List Int))
Replacing String.split with nicknamesDecoder
Now that we have understood how the list and string decoders work, let’s go back to HttpExamples.elm and replace String.split with nicknamesDecoder in the DataReceived (Ok nicknamesStr) -> branch inside update.
update : Msg -> Model -> ( Model, Cmd Msg )
update msg model =
    case msg of
        .
        .
        DataReceived (Ok nicknamesJson) ->
            case decodeString nicknamesDecoder nicknamesJson of
                Ok nicknames ->
                    ( { model | nicknames = nicknames }, Cmd.none )

                Err error ->
                    ( { model | errorMessage = handleJsonError error }
                    , Cmd.none
                    )
        .
        .
We renamed the payload from nicknamesStr to nicknamesJson and replaced the let expression with case. Unlike String.split, decodeString returns a Result. That’s why we used a case expression to dig nicknames out of Ok. If decoding fails, the handleJsonError function is used to extract the error message. Let’s add that function below update.
handleJsonError : Json.Decode.Error -> Maybe String
handleJsonError error =
    case error of
        Failure errorMessage _ ->
            Just errorMessage

        _ ->
            Just "Error: Invalid JSON"
We’re only interested in the Failure data constructor because that’s where the error message resides. The second parameter to Failure is the JSON value that caused the failure. Since we aren’t using that parameter, we replaced it with _.
Fire up elm reactor from the beginning-elm directory in terminal if it’s not running already and go to this URL in your browser: http://localhost:8000/src/HttpExamples.elm. Click the Get data from server button and you should see the same list of nicknames we saw in the Fetching Data Using GET section.

Unlike http-server, json-server automatically enables Cross-Origin Resource Sharing (CORS). That’s why we didn’t get the No 'Access-Control-Allow-Origin' header is present on the requested resource. error when fetching the nicknames.
Replacing expectString with expectJson
Let’s review the process we went through to retrieve and decode nicknames JSON.
Step 1: Create a command using Http.get. Specify which URL to use and let the Elm runtime know we’re expecting the response to be a string.
getNicknames : Cmd Msg
getNicknames =
    Http.get
        { url = url
        , expect = Http.expectString DataReceived
        }
Step 2: The runtime runs the command.
Step 3: The runtime sends DataReceived message to the update function.
- Step 3.1: Include JSON as a payload if the request to retrieve nicknames succeeds.
- Step 3.2: Include an error of type
Http.Erroras a payload if the request to retrieve nicknames fails.
Step 4: Decode JSON inside the DataReceived (Ok nicknamesJson) -> branch of update function.
- Step 4.1: If decoding succeeds, update the
nicknamesproperty in model. - Step 4.2: If decoding fails, update the
errorMessageproperty in model.
We can simplify this process quite a bit by using the Http.expectJson function instead of Http.expectString in getNicknames. Here is what the simplified process looks like:
Step 1: Create a command using Http.get. Specify which URL to use and let the Elm runtime know we’re expecting the response to be a JSON.
getNicknames : Cmd Msg
getNicknames =
    Http.get
        { url = url
        , expect = Http.expectJson DataReceived nicknamesDecoder
        }
Step 2: The runtime runs the command.
Step 3: The runtime sends DataReceived message to the update function.
-
Step 3.1: Include decoded nicknames as a payload if the request to retrieve JSON and decoding both succeed.
-
Step 3.2: Include an error of type
Http.Erroras a payload if either the request to retrieve JSON or decoding fails.
We don’t need step 4 at all if we use Http.expectJson. The retrieving and decoding of JSON happen in one go. The following diagram shows how Http.expectString and Http.expectJson differ.

Go ahead and replace Http.expectString with Http.expectJson in getNicknames as shown above if you haven’t done already. Next we need to modify the DataReceived (Ok nicknamesJson) -> branch in update.
update : Msg -> Model -> ( Model, Cmd Msg )
update msg model =
    case msg of
        .
        .
        DataReceived (Ok nicknames) ->
            ( { model | nicknames = nicknames }, Cmd.none )

        DataReceived (Err httpError) ->
            ...
Http.expectJson really simplified that branch. We don’t need to manually decode JSON anymore. It happens automatically behind the scenes. If decoding is successful, the payload will be an Elm list which we can assign directly to the nicknames field in our model. That means we need to change the DataReceived message’s definition to accept List String instead of just String.
type Msg
    = SendHttpRequest
    | DataReceived (Result Http.Error (List String))
We don’t need to modify the DataReceived (Err httpError) -> branch in update at all. If decoding fails, the Http.BadBody error will be returned which we are already handling in buildErrorMessage. Finally, remove the handleJsonError function. We don’t need it anymore.
Refresh the page at http://localhost:8000/src/HttpExamples.elm and click the Get data from server button. You should once again see the list of nicknames.
Summary
In this section, we learned how to create a local server fine-tuned for serving JSON. We retrieved some JSON from that server and translated it to Elm values using a decoder. We also learned how to simplify the overall process of fetching and decoding JSON using the Http.expectJson function instead of Http.expectString. The diagram below shows that the overall interaction between the Elm runtime and our code didn’t change much from the Fetching Data Using GET section.

In the next section, we will learn how to decode more complex JSON. Here is the entire code from HttpExamples.elm thus far:
module HttpExamples exposing (main)

import Browser
import Html exposing (..)
import Html.Events exposing (onClick)
import Http
import Json.Decode exposing (Decoder, Error(..), decodeString, list, string)


type alias Model =
    { nicknames : List String
    , errorMessage : Maybe String
    }


view : Model -> Html Msg
view model =
    div []
        [ button [ onClick SendHttpRequest ]
            [ text "Get data from server" ]
        , viewNicknamesOrError model
        ]


viewNicknamesOrError : Model -> Html Msg
viewNicknamesOrError model =
    case model.errorMessage of
        Just message ->
            viewError message

        Nothing ->
            viewNicknames model.nicknames


viewError : String -> Html Msg
viewError errorMessage =
    let
        errorHeading =
            "Couldn't fetch nicknames at this time."
    in
    div []
        [ h3 [] [ text errorHeading ]
        , text ("Error: " ++ errorMessage)
        ]


viewNicknames : List String -> Html Msg
viewNicknames nicknames =
    div []
        [ h3 [] [ text "Old School Main Characters" ]
        , ul [] (List.map viewNickname nicknames)
        ]


viewNickname : String -> Html Msg
viewNickname nickname =
    li [] [ text nickname ]


type Msg
    = SendHttpRequest
    | DataReceived (Result Http.Error (List String))


url : String
url =
    "http://localhost:5019/nicknames"


getNicknames : Cmd Msg
getNicknames =
    Http.get
        { url = url
        , expect = Http.expectJson DataReceived nicknamesDecoder
        }


nicknamesDecoder : Decoder (List String)
nicknamesDecoder =
    list string


update : Msg -> Model -> ( Model, Cmd Msg )
update msg model =
    case msg of
        SendHttpRequest ->
            ( model, getNicknames )

        DataReceived (Ok nicknames) ->
            ( { model | nicknames = nicknames }, Cmd.none )

        DataReceived (Err httpError) ->
            ( { model
                | errorMessage = Just (buildErrorMessage httpError)
              }
            , Cmd.none
            )


buildErrorMessage : Http.Error -> String
buildErrorMessage httpError =
    case httpError of
        Http.BadUrl message ->
            message

        Http.Timeout ->
            "Server is taking too long to respond. Please try again later."

        Http.NetworkError ->
            "Unable to reach server."

        Http.BadStatus statusCode ->
            "Request failed with status code: " ++ String.fromInt statusCode

        Http.BadBody message ->
            message


init : () -> ( Model, Cmd Msg )
init _ =
    ( { nicknames = []
      , errorMessage = Nothing
      }
    , Cmd.none
    )


main : Program () Model Msg
main =
    Browser.element
        { init = init
        , view = view
        , update = update
        , subscriptions = \_ -> Sub.none
        }