Quote: “Whenever trying to make complicated systems and understand them, it’s crucial to divide the things up into as many pieces as I can, each of which I understand separately. I would like to understand the way of adding things up independently of what it is I’m adding up.” - Gerald Sussman
Implementing a 4-bit Ripple-Carry Adder
Let’s work through an example to understand how functions that solve simple problems can be combined to solve a complex problem. The problem we want to solve is simulating the behavior of a 4-bit ripple-carry adder using an Elm program. “4-bit ripple-carry adder” is a bit of a mouthful, so let’s break down what that means word by word.
-
4-bit: “bit” is short for binary digit. So 4-bit means a four digit binary number, like
1001. -
Ripple-Carry: Remember how in the early days of learning addition, you were taught that when you add
5+5you carry the1left one column, resulting in10? Then once you were comfortable with that concept, you moved on to math problems with two carries — like adding95+5. First, you carry the one that is the result of5+5left one column, but then when you add1to9in that column you need to carry another1to the another left column, resulting in100. That’s basically what a “ripple-carry” is — each number that is carried out of one column is then carried in to the next column. -
Adder: A digital circuit that adds two binary numbers.
First, let’s understand how the binary system works before diving deeper into the ripple-carry adder.
Binary System
The decimal numeral system is the mathematical system most people are familiar with. In the decimal system, the integers 0 through 9 are combined in different ways to represent all numbers. It uses base-10 notation, which means each digit in a number is ten times larger than the digit to its right. The figure below breaks down the decimal number 4608 so you can see for yourself – the digits start from 100 on the right, then the next digit to the left is ten times larger at 101, then the digit to the left of that is ten times larger at 102, and so on.

The binary system, however, has only two integers — 0 and 1. It uses base-2 notation, which means each digit in a binary number is two times larger than the digit to its right. Here’s an example of the binary number 1101:

If you are wondering what decimal number the binary 1101 is equivalent to, it’s easy to find out. Just evaluate the bottom row of the above figure as one mathematical expression, and you will see that you get a final result of 13. 13 is the decimal equivalent of 1101 in binary.
Binary Addition
Adding binary numbers is much like adding everyday decimal numbers, except that it carries on a value of 2 instead of 10. For example, in decimal, if we add 6 + 3 we get 9. But if we add 6 + 4, we’ve run out of single integers to represent what comes next! That’s when the digit on the far right resets to zero, and we now have a one to carry into the next digit spot on the left.

In binary, if we add 1 + 1 we are in the same pickle as the decimal 6 + 4 example above: we have exhausted the integers available to us. When you run out of integers, it’s time to reset the digit on the right to zero and carry the one into the next digit spot on the left.

By this logic, it’s easy to keep adding binary numbers together. Let’s find out what the decimal number 4 is equivalent to in binary. Remember, every time we run out of numbers, that means it’s time to reset to zero and carry the one:

Now we can see, 4 in decimal system is 100 in binary.
Adding Numbers with a 4-bit Ripple-Carry Adder
A 4-bit ripple-carry adder can add binary numbers up to four digits. The figure below shows an example, adding the binary numbers 1110 + 1011, with the digits to carry shown in purple.

A ripple-carry adder adds two digits at a time starting from the right. If there’s a carry, it propagates that to the next addition. Once it’s done adding all four digits, the output is presented to us like this:

A0, A1, A2, and A3 represent the individual digits of the first number. B0, B1, B2, and B3 represent the individual digits of the second number. S0, S1, S2, and S3 represent the individual digits of the sum. Cout represents the most significant digit of the sum. The most significant digit is the digit that has the greatest value. In the case of a binary number, that’s the digit all the way to the left. Here is a circuit diagram for a 4-bit ripple-carry adder.

Cin is the carry-in bit from the previous addition and Cout is the carry-out bit that will be passed to the next addition.
The circuit above is what we want to simulate in Elm. Where should we start? Well, the first thing we need to do is look for ways to break the problem at hand into smaller problems. If we look closer, we can see that a ripple-carry adder uses the same adder repeatedly but with different inputs and outputs. This adder acts as a building block for a ripple-carry adder and is called 1-bit full adder. Let’s figure out how we can implement a 1-bit full adder before we implement a ripple-carry adder.
1-bit Full Adder
A 1-bit full adder adds only two binary digits, but it’s capable of accepting a carry-in value as well. It takes three inputs and produces two outputs as shown in the figure below:

An and Bn represent the binary digits that need adding. Cn represents the carry-in digit, and Cn+1 represents the carry-out digit. Sn represents the least significant digit of the sum. The least significant digit is the digit that has the lowest value. In a binary number, that’s the digit all the way to the right. Here’s a truth table that shows all the possible inputs and outputs produced by a full adder:

Can we break a 1-bit full adder further into something even smaller? As it turns out, we can as shown in the figure below.

A full adder can be implemented using two half adders and an OR gate. We’ll find out what an OR gate is soon, but first let’s understand how a half adder works.
Half Adder
A half adder also adds two binary digits, but unlike a full adder it doesn’t accept a carry-in value.

Here’s a truth table that shows all the possible inputs and outputs for a half adder:

We can break its implementation into even smaller components: AND gate, OR gate, and inverter.

AND Gate
An AND gate takes two input signals and returns an output that is the logical and of the inputs. It’s equivalent to the && operator in Elm.


OR Gate
An OR gate takes two input signals and returns an output that is the logical or of the inputs. It’s equivalent to the || operator in Elm.


Inverter
An inverter takes one input signal and inverts it. If the input is 0 it returns 1 as the output. If the input is 1, it returns 0 as the output. It’s equivalent to the not function in Elm.


Now that we have broken down our original problem (4-bit ripple-carry) into its essential building blocks (AND gate, OR gate, and inverter), we can start building a solution by first implementing the building blocks.
Implementing an AND Gate
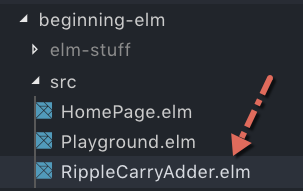
Let’s create a separate file that will contain all the code we will be writing as we implement different parts of a 4-bit ripple-carry adder. In the beginning-elm/src directory, create a new file called RippleCarryAdder.elm.
Add the following code to the RippleCarryAdder.elm file.
module RippleCarryAdder exposing (andGate)

import Bitwise


andGate a b =
    Bitwise.and a b
We declared a new module called RippleCarryAdder and imported an existing module called Bitwise, which includes functions for manipulating individual bits. As it so happens, the Bitwise.and function does exactly what our AND gate is supposed to do which is to compute a logical and of two input signals.
You may be wondering why we didn’t just use the && operator to implement the andGate function. That’s because it only works for boolean values. Since we are trying to simulate a digital circuit, we want to work with 0s and 1s instead of True and False although conceptually they are equivalent in our case.
In most cases it doesn’t make sense to create a new function that just wraps an existing function, but here the name andGate is bit more revealing in the context of a digital circuit than just and.
Let’s load andGate in repl and verify that it works as expected. Run elm repl from the beginning-elm directory in terminal to launch the repl, and expose the andGate function when importing the RippleCarryAdder module like this:
> import RippleCarryAdder exposing (..)

> andGate 0 0
0

> andGate 0 1
0

> andGate 1 0
0

> andGate 1 1
1
Note: Unlike the Playground module, we didn’t write a main function in RippleCarryAdder. That’s because we will be executing the code in RippleCarryAdder only from the repl. We need a main function only if we want to run our code in the browser.
Although there’s only one function in the RippleCarryAdder module right now, we used (..) to expose everything in it. It’ll make it easier for us to test things from that module as we add more functions to it. Our function names will continue to be very descriptive, so there’s a very little chance of them colliding with other names that may have already been imported.
Implementing an OR Gate
The Bitwise module also includes a function for computing a logical or of two signals. Let’s use that to implement an OR gate. Add the following function to the bottom of RippleCarryAdder.elm.
orGate a b =
    Bitwise.or a b
We also need to expose the orGate function. Modify the first line in RippleCarryAdder.elm to this:
module RippleCarryAdder exposing (andGate, orGate)Note: When defining a module, Elm doesn’t allow us to expose everything inside it by using (..). We can do that only when we import the module as we saw earlier inside elm repl. Therefore, we have to explicitly mention the name of the value we intend to expose after the exposing keyword. This is a good thing. We should expose as little as possible from a module. This reduces unnecessary dependencies between modules making our code more maintainable. We’ll discuss this in detail later in the Easier Code Organization section.
Let’s load orGate up in the repl and verify that it works as expected.
> orGate 0 0
0

> orGate 0 1
1

> orGate 1 0
1

> orGate 1 1
1
We don’t need to reimport the RippleCarryAdder module whenever we make any changes to it. The repl automatically reloads a module when it detects a change. Isn’t that nice?
Implementing an Inverter
There is no suitable function in the Bitwise module that does what an inverter is supposed to do, so let’s roll our own. Add the following function to the bottom of RippleCarryAdder.elm.
inverter a =
    case a of
        0 ->
            1

        1 ->
            0

        _ ->
            -1
And expose inverter in the module definition.
module RippleCarryAdder exposing (andGate, inverter, orGate)Note: Did you notice that elm-format automatically sorts the exposed values in alphabetical order? That’s nice, isn’t it? The Elm core team members have been working hard to bring us tools that save time by automating mundane tasks like this.
The inverter function flips the input signal using a case expression. If the input signal is 0 it returns 1 and vice versa. If the input signal is anything other than 0 or 1, it returns -1. We used negative 1 to indicate an input signal doesn’t represent a valid binary number, although any number other than 0 and 1 would work.
If we don’t add the _ -> -1 catch-all pattern, Elm will complain because without it we wouldn’t be accounting for all possible integer values the parameter a can hold. This is not an elegant way to implement an inverter, but it gets the job done. Once we get introduced to types later in this chapter, we can refine this implementation. Let’s verify that inverter works as expected in the repl.
> inverter 0
1

> inverter 1
0
Now that we have implemented the basic building blocks, we can start implementing the more complex parts.
Implementing a Half Adder
We can implement a half adder by adding the following function to the bottom of RippleCarryAdder.elm.
halfAdder a b =
    let
        d =
            orGate a b

        e =
            andGate a b
                |> inverter

        sumDigit =
            andGate d e

        carryOut =
            andGate a b
    in
    { carry = carryOut
    , sum = sumDigit
    }
Let’s expose halfAdder in the module definition.
module RippleCarryAdder exposing (andGate, halfAdder, inverter, orGate)The halfAdder function mimics the half adder circuit we saw earlier. It uses all three logic gates we implemented before to compute a sum and a carry which are then returned as a record. The constants d and e hold onto the intermediate results that get passed to an AND gate to compute the final sum.
In the Using Tuples section, we learned that when we want to return multiple values from a function, we should consider using a tuple. But records are also useful for returning multiple values. If we use a record in this instance, when we look at the output of halfAdder, it’ll be easier for us to recognize which digit is a sum and which digit is a carry.
In the record above we added the comma in front of sum = sumDigit instead of adding it at the end of the previous line. In most languages, it’s best practice to add commas at the end when we create a collection, but the Elm style guide recommends adding them in the front. That’s because it’s easier to spot a missing comma when they’re all in the front. For example, here’s a bigger record with commas in the end:
{ carry1 = carryOut1,
  sum1 = sumDigit1,
  carry2 = carryOut2
  sum2 = sumDigit2,
  carry3 = carryOut3,
  sum3 = sumDigit3
}
It’s hard to notice that the third line is missing a comma. But if we move them all to the front it’s much easier to spot a missing comma.
{ carry1 = carryOut1
, sum1 = sumDigit1
, carry2 = carryOut2
  sum2 = sumDigit2
, carry3 = carryOut3
, sum3 = sumDigit3
}
The Elm compiler will easily catch errors like this, but by putting the commas in the front we save ourselves an extra trip to the compiler land. Let’s verify that the halfAdder function works as expected.
> halfAdder 0 0
{ carry = 0, sum = 0 }

> halfAdder 0 1
{ carry = 0, sum = 1 }

> halfAdder 1 0
{ carry = 0, sum = 1 }

> halfAdder 1 1
{ carry = 1, sum = 0 }
Implementing a 1-bit Full Adder
Let’s implement a full adder next by using two half adders and an OR gate. Add the following function to the bottom of RippleCarryAdder.elm.
fullAdder a b carryIn =
    let
        firstResult =
            halfAdder b carryIn

        secondResult =
            halfAdder a firstResult.sum

        finalCarry =
            orGate firstResult.carry secondResult.carry
    in
    { carry = finalCarry
    , sum = secondResult.sum
    }
And expose fullAdder in the module definition.
module RippleCarryAdder exposing
    ( andGate
    , fullAdder
    , halfAdder
    , inverter
    , orGate
    )
Note: When the module definition line gets too long, it’s recommended that you break it into multiple lines as we have done here.
The fullAdder function also mimics the full adder circuit we saw earlier. A full adder is capable of taking a carry-in value as one of the inputs. So we give it a third parameter that represents a carry-in value in addition to the two input signals: a and b. Let’s verify that the logic in fullAdder works as expected.
> fullAdder 0 0 0
{ carry = 0, sum = 0 }

> fullAdder 0 0 1
{ carry = 0, sum = 1 }

> fullAdder 0 1 0
{ carry = 0, sum = 1 }

> fullAdder 0 1 1
{ carry = 1, sum = 0 }

> fullAdder 1 0 0
{ carry = 0, sum = 1 }

> fullAdder 1 0 1
{ carry = 1, sum = 0 }

> fullAdder 1 1 0
{ carry = 1, sum = 0 }

> fullAdder 1 1 1
{ carry = 1, sum = 1 }
Implementing a 4-bit Ripple-Carry Adder
Finally, we’re ready to implement a 4-bit ripple-carry adder. Add the following code to the bottom of RippleCarryAdder.elm.
type alias Binary =
    { d0 : Int
    , d1 : Int
    , d2 : Int
    , d3 : Int
    }


rippleCarryAdder a b carryIn =
    let
        firstResult =
            fullAdder a.d3 b.d3 carryIn

        secondResult =
            fullAdder a.d2 b.d2 firstResult.carry

        thirdResult =
            fullAdder a.d1 b.d1 secondResult.carry

        finalResult =
            fullAdder a.d0 b.d0 thirdResult.carry
    in
    { carry = finalResult.carry
    , sum0 = finalResult.sum
    , sum1 = thirdResult.sum
    , sum2 = secondResult.sum
    , sum3 = firstResult.sum
    }
And expose Binary and rippleCarryAdder in the module definition.
module RippleCarryAdder exposing
    ( Binary
    , rippleCarryAdder
    .
    .
    )
Unlike most other languages, Elm doesn’t provide a way to represent binary numbers yet. For example, in JavaScript we can represent them by adding 0b as a prefix:
var a = 0b1110    // Equivalent to 14 in decimal
var b = 0b1011    // Equivalent to 11 in decimal
Therefore, we have to do some extra work to pass binary numbers as inputs to the rippleCarryAdder function. For now, the simplest way is to define a record called Binary.
type alias Binary =
    { d0 : Int
    , d1 : Int
    , d2 : Int
    , d3 : Int
    }
rippleCarryAdder computes the final sum and a carry-out by repeatedly applying the fullAdder function to each digit. Let’s verify that it works as expected.
> a = Binary 1 1 0 1
{ d0 = 1, d1 = 1, d2 = 0, d3 = 1 }

> b = Binary 1 0 1 1
{ d0 = 1, d1 = 0, d2 = 1, d3 = 1 }

> rippleCarryAdder a b 0
{ carry = 1, sum0 = 1, sum1 = 0, sum2 = 0, sum3 = 0 }
To summarize, we took a complex problem of building a 4-bit ripple-carry adder and broke it down to its essential building blocks: AND gate, OR gate, and inverter. We used those building blocks to implement a half adder. We then used a half adder and an OR gate to implement a full adder. Finally, we combined four full adders to implement a 4-bit ripple-carry adder.
We used small reliable functions to build bigger and equally reliable functions. This pattern of solving a complex problem by combining small functions is quite common in functional programming languages such as Elm. The main reason this pattern works well is because all functions in Elm are pure.
Improving Inputs and Outputs
The rippleCarryAdder function uses records to represent the input and output signals. It would be much nicer, if we could just use plain old numbers like this:
rippleCarryAdder 1110 1011 0
11001

rippleCarryAdder 1110 1011 1
11010
Improving Inputs
The first thing we need to do is extract digits from a binary number so that we can pass them individually to different full adders. Modify the rippleCarryAdder function as shown below. It now accepts numbers instead of records.
rippleCarryAdder a b carryIn =
    let
        -- Extract digits
        firstSignal =
            extractDigits a

        secondSignal =
            extractDigits b

        -- Compute sum and carry-out
        firstResult =
            fullAdder firstSignal.d3 secondSignal.d3 carryIn

        secondResult =
            fullAdder firstSignal.d2 secondSignal.d2 firstResult.carry

        thirdResult =
            fullAdder firstSignal.d1 secondSignal.d1 secondResult.carry

        finalResult =
            fullAdder firstSignal.d0 secondSignal.d0 thirdResult.carry
    in
    { carry = finalResult.carry
    , sum0 = finalResult.sum
    , sum1 = thirdResult.sum
    , sum2 = secondResult.sum
    , sum3 = firstResult.sum
    }
Implementing extractDigits
We used a non-existent function called extractDigits to extract digits from input numbers. Let’s implement it next. Add the following code to the bottom of RippleCarryAdder.elm.
extractDigits number =
    String.fromInt number
        |> String.split ""
        |> List.map stringToInt
        |> Array.fromList
        |> arrayToRecord
extractDigits accepts a number representing binary digits and takes it through several transformations until all digits have been extracted. Let’s understand how each transformation works.
Note: You don’t have to try the code listed in each step below. It’s there to show how extractDigits works. Some of it won’t even compile because we haven’t implemented all functions used inside extractDigits yet.
Step 1: Convert the input number to a string.
> String.fromInt 1110
"1110"
Step 2: Split the string into a list.
> String.split "" "1110"
["1","1","1","0"]
Step 3: Convert each string element inside the list back to a number.
> List.map stringToInt [ "1", "1", "1", "0" ]
[1,1,1,0]
Note: Steps 1, 2, and 3 collectively represent a roundabout way of converting a number to a list of digits. Unfortunately, Elm doesn’t provide a straightforward function for that.
Step 4: Convert the list to an array so that we can access each digit by specifying an index.
> Array.fromList [ 1, 1, 1, 0 ]
Array.fromList [1,1,1,0]
Step 5: Convert the array to a record.
> arrayToRecord (Array.fromList [ 1, 1, 1, 0 ])
{ d0 = 1, d1 = 1, d2 = 1, d3 = 0 }
Implementing stringToInt
Next, let’s implement the stringToInt function we used inside extractDigits. Add the following code to the bottom of RippleCarryAdder.elm.
stringToInt string =
    String.toInt string
        |> Maybe.withDefault -1
As its name suggests, the stringToInt function takes a string and converts it to an integer. String.toInt returns a Maybe because not all strings can be converted to an integer.
> String.toInt "1"
Just 1 : Maybe Int

> String.toInt "hello"
Nothing : Maybe Int
As we learned in the Regular Expressions section, the Maybe.withDefault function can be used to extract a value out of a Maybe container. If the value is present, Maybe.withDefaut will unwrap it from Just. If the value is Nothing, it’ll return a default value. In stringToInt function above, the default value is -1, which represents an invalid binary number.
Implementing arrayToRecord
Next up, we need to implement the arrayToRecord function. Add the following code to the bottom of RippleCarryAdder.elm.
arrayToRecord array =
    let
        firstElement =
            Array.get 0 array
                |> Maybe.withDefault -1

        secondElement =
            Array.get 1 array
                |> Maybe.withDefault -1

        thirdElement =
            Array.get 2 array
                |> Maybe.withDefault -1

        fourthElement =
            Array.get 3 array
                |> Maybe.withDefault -1
    in
    { d0 = firstElement
    , d1 = secondElement
    , d2 = thirdElement
    , d3 = fourthElement
    }
The Array module isn’t imported automatically by Elm, so we need to do that ourselves. Import it right above the line that imports the Bitwise module in RippleCarryAdder.elm.
module RippleCarryAdder exposing
.
.
import Array
import Bitwise
As its name suggests, the arrayToRecord function takes an array, reads values at each index and puts them in a record. As we learned in
the Array section, we can use the Array.get function to read a value from an array at a specific index.
> import Array

> myArray = Array.fromList [ 0, 1, 2, 3, 4 ]
Array.fromList [0,1,2,3,4]

> Array.get 3 myArray
Just 3 : Maybe number
Like String.toInt, Array.get also doesn’t return the value we’re looking for directly. It returns a Maybe instead. That’s why we had to use the Maybe.withDefault function to extract each element. Now we can pass input signals as plain old numbers to rippleCarryAdder.
> rippleCarryAdder 1110 1011 0
{ carry = 1, sum0 = 1, sum1 = 0, sum2 = 0, sum3 = 1 }
Ah, much better!
Improving Output
Let’s turn our attention to the output. Currently it looks like this:
{ carry = 1, sum0 = 1, sum1 = 0, sum2 = 0, sum3 = 1 }We want it to look like this instead:
11001It’s not difficult to show the output as a number. All we need to do is assemble the sum and carry-out digits in a list and turn that list into a number. Modify the code inside the in area in rippleCarryAdder function to the following.
rippleCarryAdder a b carryIn =
    let
        .
        .
    in
    [ finalResult, thirdResult, secondResult, firstResult ]
        |> List.map .sum
        |> (::) finalResult.carry
        |> numberFromDigits
Let’s go through the new code step by step.
Note: You don’t have to try the code listed in each step below. It’s there to show how rippleCarryAdder produces a binary number as an output. Some of it won’t even compile because we haven’t implemented all functions used inside rippleCarryAdder yet.
Step 1: Put the records produced by each full adder into a list.
> [ finalResult, thirdResult, secondResult, firstResult ]
...
Here is the output after some formatting:
[
    { carry = 1, sum = 1 },
    { carry = 1, sum = 0 },
    { carry = 1, sum = 0 },
    { carry = 0, sum = 1 }
]
Step 2: Map the list of records into a list of sum digits.
> List.map .sum [ finalResult, thirdResult, secondResult, firstResult ]
[1,0,0,1]
As mentioned in the Record section, the map function can be used to transform a list of records into a new list that contains values from a specific field. We used a special function called .sum to extract the sum digits from each record.
Step 3: Add the carry-out digit to the front of the list.
> (::) finalResult.carry [1,0,0,1]
[1,1,0,0,1]
Step 4: Convert the list of digits into a number.
> numberFromDigits [1,1,0,0,1]
11001
numberFromDigits is a function we haven’t implemented yet. Let’s do that next. Add the following function to the bottom of RippleCarryAdder.elm.
numberFromDigits digitsList =
    List.foldl (\digit number -> digit + 10 * number) 0 digitsList
numberFromDigits uses foldl to reduce a list of digits into a single number. If you don’t remember how foldl works, you may want to review the Folding a List section from chapter 3. The figure below shows how numberFromDigits combines the digits to create a number by repeatedly applying the anonymous function to each element in digitsList.

Now both inputs and outputs look much nicer.
> rippleCarryAdder 1110 1011 0
11001
Inputs with Leading Zeros
Let’s try entering a binary number with leading zeros and see what happens.
> rippleCarryAdder 1001 0011 0

----------------------- PARSE ERROR ---------------------------------
Normal numbers cannot start with zeros. Take the zeros off the front.

9|   rippleCarryAdder 1001 0011 0
                            ^
Only numbers like 0x0040 or 0.25 can start with a zero.
Unfortunately, Elm doesn’t like that. One way to get around this limitation is by padding the input with enough zeros in extractDigits like this:
extractDigits number =
    String.fromInt number
        |> String.padLeft 4 '0'
        |> String.split ""
        |> List.map stringToInt
        |> Array.fromList
        |> arrayToRecord
But this whole approach of converting a number to a string which gets padded with zeros and then gets converted back to numbers feels a bit clumsy. Why don’t we write a function that directly converts a number into a list of digits without involving any string operation? Add the following function to the bottom of RippleCarryAdder.elm.
digits number =
    if number == 0 then
        []

    else
        digits (number // 10) ++ [ remainderBy 10 number ]
And expose digits in the module definition.
module RippleCarryAdder exposing
    ( digits
    .
    .
    )
Note: It’s not a good idea to expose private helper functions such as digits. We should only expose public functions that are meant to be used by other modules. The reason we’re exposing digits here is so that we can try it out in elm repl. We’ll cover private functions in detail in the Making Functions Private and Fuzz Testing sections later in this chapter.
The digits function takes a number and returns a list of digits.
> digits 1100
[1,1,0,0]
When we set out to implement a 4-bit ripple-carry adder, we broke the problem at hand into smaller sub-problems, solved them individually and combined the results. The digits function follows a similar approach, but instead of using other functions to solve the sub-problems it solves them by itself. To understand how it does that, let’s break the problem of extracting digits from 1100 into multiple sub-problems.

We start with the number 1100 which is our original problem. We take the last digit from it and reduce the problem to 110. We then take the last digit from 110 and further reduce the problem to 11. We continue to do this until there are no digits left in which case we simply return an empty list. Then we combine the solution to each sub-problem one at a time moving from left to right.
Recursion
This process of solving a problem by first solving the smaller versions of the same problem is called recursion. The problem eventually gets reduced to something so small that we can just solve it directly. This is called a base case. In the example above, when there’s no digit left in the number we know that we’ve arrived at the base case. We then solve it by simply returning an empty list.
Like most programming languages, Elm supports recursion by allowing a function to apply itself as we have done in the definition of digits. When using recursion, we need to keep the following three things in mind.
1. How do we reduce the problem? If a problem can’t be reduced to smaller versions of itself then recursion probably isn’t the best tool to solve that problem. Therefore, we need to know how exactly are we going to reduce the problem. The digits function does this by dividing the number by 10.
digits (number // 10)The // operator performs integer division, which truncates everything after the decimal point. We didn’t use recursion to build a 4-bit ripple-carry adder because we couldn’t reduce the problem into smaller versions of itself. Therefore, we had to assemble a bunch of other functions to solve the original problem instead of applying itself repeatedly.
2. What is the base case? A properly designed recursive function must simplify the problem with each invocation so that it will eventually reach the base case. Once the execution hits the base case, then it pops back out and starts gathering the results from each invocation. If we don’t provide a base case, a recursive function will create an infinite loop. Here’s the base case from the digits function:
if number == 0 then
    []
After the third invocation of the digits function, the number 1100 gets reduced to 1. When integer division is performed on that number by 10, the number becomes 0. At that point the condition for the base case is satisfied and an empty list is returned. If we didn’t have this condition, the digits function would run forever.
3. How do we combine the result of each sub problem? Once the base case is reached, we need to provide a mechanism for combining the result from each invocation. The digits function does this by using the ++ operator.
digits (number // 10) ++ [ remainderBy 10 number ]To see how recursion works behind the scenes, let’s walk through each step in the digits function’s execution.

Breaking down a recursive function’s invocations like this is fine when we are trying to understand how recursion works in the beginning, but once we have developed an intuition for recursion we should avoid thinking explicitly about the sequence of invocations. We should instead focus on the three things we discussed above.
Hopefully you now understand how recursion works. If not, don’t worry. It’s a tricky concept. You just need more practice writing recursive functions and reasoning through them. There are many resources out there for diving deeper into recursion. I recommend checking out Khan Academy’s mini-course that not only explains recursion in simple terms, but also provides exercises for you to practice.
Improving the digits Function’s Performance
In Elm, it’s more efficient from performance standpoint to build a list by adding an element to the front using the cons (::) operator than by appending values to the end using the ++ operator. Let’s say we have a list like this: [ 2, 3, 4, 5 ]. And we want to add 1 to the front of that list.
> 1 :: [ 2, 3, 4, 5 ]
[1,2,3,4,5]
The cons operator doesn’t traverse the entire list before adding the given number to the front. Whereas ++ does. Therefore this code:
> [ 2, 3, 4, 5 ] ++ [ 6 ]
[2,3,4,5,6]
Essentially turns into this behind the scenes:
> 5 :: [ 6 ]
[5,6]

> 4 :: [ 5, 6 ]
[4,5,6]

> 3 :: [ 4, 5, 6 ]
[3,4,5,6]

> 2 :: [ 3, 4, 5, 6 ]
[2,3,4,5,6]
Earlier we used ++ to append a single element to a list in the digits function like this:
digits number =
    .
    .
    else
        digits (number // 10) ++ [ remainderBy 10 number ]
Now that we know the cons operator is more performant, let’s change the digits function to use that instead. Since the calculations being done here are so small, we won’t see much of a speed difference between the two operators. It’s when we are passing a very big number through digits that the speed differences really start to add up. Change the digits function in RippleCarryAdder.elm to use the cons operator like this:
digits number =
    let
        getDigits n =
            if n == 0 then
                []

            else
                remainderBy 10 n :: getDigits (n // 10)
    in
    getDigits number
        |> List.reverse
With your new found understanding of recursion, you should be able to figure out how the new implementation above works. Modify the extractDigits function in RippleCarryAdder.elm to use the new digits function:
extractDigits number =
    digits number
        |> Array.fromList
        |> arrayToRecord
The extractDigits function now looks much more succinct with the digits function. Here’s how it looked before:
extractDigits number =
    String.fromInt number
        |> String.split ""
        |> List.map stringToInt
        |> Array.fromList
        |> arrayToRecord
Adding a Number with Leading Zeros
The new implementation of the extractDigits function still doesn’t solve the problem of adding a binary number with leading zeros, but it’s quite easy to pad zeros to the front of a list. Add the following function to the bottom of RippleCarryAdder.elm.
padZeros total list =
    let
        numberOfZeros =
            total - List.length list
    in
    List.repeat numberOfZeros 0 ++ list
The padZeros function pads a list with zeros until it reaches a given length represented by the parameter named total. Let’s call padZeros from extractDigits in RippleCarryAdder.elm.
extractDigits number =
    digits number
        |> padZeros 4
        |> Array.fromList
        |> arrayToRecord
Now when we add a binary number with leading zeros, we get a correct result.
> rippleCarryAdder 1001 11 0
1100
As we found out earlier, we can’t actually type leading zeros in Elm, so assume the second argument 11 has two zeros before it like this: 0011. In the next section, we will learn how to verify rippleCarryAdder behaves as expected using unit tests.