We can use commands to execute operations that may cause side effects. Like messages, commands are also represented as data. Think of them as data structures that store information about an action we want to perform. We then hand that data structure over to the Elm runtime. The runtime will execute the action specified in the command and notify our application with a result. That sounds really vague, doesn’t it? Let’s look at an example for generating random numbers to make things a bit more concrete.
Generating Random Numbers
There are two main approaches to generating random numbers: True Random Number Generators (TRNGs) and Pseudo-Random Number Generators (PRNGs). TRNGs generate numbers from truly random physical phenomena, for example the little variations in someone’s mouse movements or the point in time at which a radioactive material decays or the atmospheric noise picked up by a radio.
Due to their reliance on a physical phenomena, TRNGs take considerably longer time to generate random numbers. Therefore, most computer programs that need random numbers quickly tend to rely on PRNGs which are much more efficient than TRNGs. Despite their efficiency, PRNGs are not suitable for applications that need truly unpredictable random numbers, such as encryption key generators.
PRNGs take an initial value (called seed) and apply an algorithm to generate a seemingly random number. The modern algorithms used by PRNGs are so good that the numbers generated by them look quite random.

However, if we use the same initial seed multiple times we will get the exact same number each time.

Generating Random Numbers without Side Effects
Let’s explore this behavior of PRNGs further by entering some code in elm repl. But first we need to install the elm/random package. Run the following command from the beginning-elm directory in terminal.
$ elm install elm/randomThe elm-explorations/test package we used earlier in the Easy to Test section depends on elm/random. That’s why when we installed it, elm/random was automatically added as an indirect dependency to the test-dependencies field in elm.json. Now elm install is asking us if it’s okay to move it to the dependencies field. Go ahead and answer y.
All packages in the dependencies field are also available in tests, so we’ll still be able to run our tests without any issues. Run elm repl from the beginning-elm directory in terminal and import the Random module included in elm/random.
> import RandomWe’re now ready to generate an initial seed.
> seed0 = Random.initialSeed 31415
Seed 1947881085 1013904223 : Random.Seed
The initialSeed function takes an integer and returns a seed. We randomly picked the number 31415 as an input. Here’s what the initialSeed function’s type signature looks like:
initialSeed : Int -> SeedThe Seed type is defined in the Random module like this:

Opaque Type
Seed is an opaque type. Opaque types use the same name for type and data constructors to hide internal details. Let’s explore this idea further by creating a new file called Profile.elm in the beginning-elm/src directory.

Add the following code to Profile.elm.
module Profile exposing (Name)


type alias Name =
    { firstName : String
    , lastName : String
    }
Name is a type alias to a record with two fields. Since we exposed it in the module definition, any code outside of Profile can access it. The firstName and lastName fields are also accessible from outside. Let’s test that assertion in elm repl.
> import Profile exposing (..)

> tobias = Name "Tobias" "Funke"
{ firstName = "Tobias", lastName = "Funke" }
    : Name

> tobias.firstName
"Tobias" : String

> tobias.lastName
"Funke" : String
What if we don’t want the outside code to know how the Name type is implemented? We may want to add middle name to our definition in the future. The way things are right now, the code that uses Name will certainly break if we introduce a new field. How about we re-implement Name as an opaque type like this in Profile.elm:
module Profile exposing (Name)


type Name
    = Name String String
Now any code outside of Profile.elm won’t be able to access the internal fields (firstName and lastName) like it used to. Let’s try to create a name using the new opaque type.
> tobias = Name "Tobias" "Funke"

---------- NAMING ERROR -----------
I cannot find a `Name` constructor:

4| tobias = Name "Tobias" "Funke"
            ^^^^
Unfortunately, we lost the ability to create a name. We can expose the underlying data constructor by adding (..) next to Name in module definition like this:
module Profile exposing (Name(..))


type Name
    = Name String String
And that will allow us to create a name using the Name data constructor.
> tobias = Name "Tobias" "Funke"
Name "Tobias" "Funke" : Name
However, exposing the underlying data constructor defeats the purpose. We want to hide the internal details of our type and still be able to create a name. To do that, we need to introduce a new function whose sole purpose is to create a name. Remove (..) from the module definition and add a new function called createName to Profile.elm.
module Profile exposing (Name, createName)


type Name
    = Name String String


createName : String -> String -> Name
createName firstName lastName =
    Name firstName lastName
Restart elm repl and enter the following code.
> import Profile exposing (..)

> tobias = createName "Tobias" "Funke"
Name "Tobias" "Funke" : Name
Now we can create a name from outside Profile without having to know the internal details of Name.
Back to Seed
The Random module applies the same technique used in Profile.elm to hide the internal details of Seed while also allowing us to create a seed using the initialSeed function.
> import Random

> seed0 = Random.initialSeed 31415
Seed 1947881085 1013904223 : Random.Seed
Now that we have an initial seed, we can use the Random.step function to generate a random value.
> Random.step (Random.int 0 100) seed0
(35,Seed 1195359672 1013904223)
    : ( Int, Random.Seed )
The output is a tuple. The first element is a random number and the second element is the seed we can use to generate the next random number. As mentioned earlier, we need to provide a different seed to the step function each time we want to generate a new random number. Otherwise, we keep getting the same number over and over again. That’s why the step function returns a new seed in addition to a random number.

step takes a random number generator and a seed as inputs. Here’s what its type signature looks like:
step : Generator a -> Seed -> (a, Seed)The Random.int 0 100 expression we typed into the repl earlier creates a generator that produces random 32-bit integers between 0 and 100.
> Random.int 0 100
Generator <function> : Random.Generator Int
It’s important to understand that the Random.int function itself doesn’t generate a random number. It returns a generator which can be passed to other functions such as step that will in turn ask that generator to produce the actual random numbers.
Think of a generator as a recipe for generating certain types of random values. So Random.int 0 100 describes how to create a recipe for generating integers between 0 and 100. Similarly, Random.float 0 1 describes how to create a recipe for generating floating-point numbers between 0 and 1.
Next, we’ll capture the new seed returned by the step function so that we can use it to generate a different random number.
> result = Random.step (Random.int 0 100) seed0
(35,Seed 1195359672 1013904223)
    : ( Int, Random.Seed )

> randomNumber = Tuple.first result
35 : Int

> newSeed = Tuple.second result
Seed 1195359672 1013904223 : Random.Seed
Now, we’re ready to generate a new random number.
> Random.step (Random.int 0 100) newSeed
(91,Seed 3342525879 1013904223)
    : ( Int, Random.Seed )
This time we got 91 as the new number. Last time it was 35. The numbers inside the Seed type also changed. If those numbers didn’t change we would get the same random number again and again. What this means is that Random.step is a pure function and doesn’t generate any side effects. It returns the exact same output given the same input.
Generating Random Numbers with Side Effects
The process of manually providing seed values, as we’ve done so far, has some drawbacks. First, it is cumbersome. Second, it makes the random number sequence predictable. Elm provides a way to get rid of these hurdles by picking an unpredictable initial seed value by default. It does so by using the current time generated by a real-time clock embedded in our computers to produce seed values.
As soon as we transfer the responsibility of picking the initial seed value to the Elm runtime, the random number generation process causes side effects. To get the initial seed value, it has to now interact with a real-time clock, which is part of the outside world. This is where commands come in handy.

To generate random numbers with side effects we need to follow the Elm Architecture. It’s hard to write a full fledged program in repl, so we’ll create a new file called RandomNumber.elm in the beginning-elm/src directory.

Model
The first thing we need to define is our model. Add the following code to RandomNumber.elm.
module RandomNumber exposing (Model)


type alias Model =
    Int
All we need to keep track of here is a number. The above model looks exactly like the one we defined for the counter app in Model View Update - Part 1. Next, we need to create an initial model. Add the following code to the bottom of RandomNumber.elm.
init : ( Model, Cmd msg )
init =
    ( 0, Cmd.none )
When commands are involved, the code for initializing our model becomes a little more complex. In the counter app, all we had to do was return an integer as shown below.
initialModel : Model
initialModel =
    0
Let’s go through each change one by one.
Change #1: The function name changed from initialModel to init since we’re doing more than just initializing a model.
Change #2: The init function now returns a tuple. The first element represents the model and the second element represents commands. In addition to providing an initial value for the model, we need to tell the runtime what commands to run when the app is being loaded. Since we don’t want to run any commands during initialization, we simply return Cmd.none. The Cmd type represents commands in Elm. It’s defined in the Platform.Cmd module. none is a constant which returns an empty list of commands. It’s also defined in the Platform.Cmd module.
Let’s say when our app is launched we need to restore its state from a remote server which lies outside the boundary of our app. In this scenario, we need to rely on the Elm runtime to retrieve the state by returning a command from init.

Change #3: The type annotation has also changed to init : ( Model, Cmd msg ). We already know what Model is. Cmd msg means a command that will
notify our app with results by sending messages of type msg. msg is just a type variable, so it doesn’t represent a concrete type. Later in this section, we’ll define a type called Msg to be more specific about which messages our app can accept.
View
Next, we need to present the initial model to the user. Add the following code to the bottom of RandomNumber.elm.
view : Model -> Html msg
view model =
    div []
        [ button [] [ text "Generate Random Number" ]
        , text (String.fromInt model)
        ]
Our view is very simple. All we’re displaying is a button and the string representation of a random number. We also need to import the Html module in RandomNumber.elm.
module RandomNumber exposing (Model)

import Html exposing (..)
.
.
Update
Right now, the Generate Random Number button doesn’t do anything. Let’s define a message that will get triggered when that button is clicked. Add the following type definition to the bottom of RandomNumber.elm.
type Msg
    = GenerateRandomNumber
To respond to the GenerateRandomNumber message, we need to introduce update. Add the following code to the bottom of RandomNumber.elm.
update : Msg -> Model -> ( Model, Cmd Msg )
update msg model =
    case msg of
        GenerateRandomNumber ->
            ( model, Random.generate NewRandomNumber (Random.int 0 100) )
Notice how update and init (or initialModel in the previous sections) tend to have the same return types. Here is update from the counter app for comparison:
update : Msg -> Model -> Model
update msg model =
    case msg of
        Increment ->
            model + 1

        Decrement ->
            model - 1
Let’s understand what’s going on in the body of the new update function. When the GenerateRandomNumber message is received, we return an unmodified model and a command for generating a random number. The command is generated by using the generate function defined in the Random module.
Note: In Elm, we don’t tend to use some constructor function defined in the Platform.Cmd module to create commands. Instead, we rely on functions like generate. Here’s another example: let’s say we want to create a command that sends an HTTP request to a remote server. We can use the Http.send function to generate that command. We just look for an appropriate function in a module and use it to create a command.
generate tries to achieve the same goal as the step function — generate a random number. The way it goes about achieving that goal, however, is very different. step uses a generator and a seed to return a random number instantly.
> Random.step (Random.int 0 100) seed0generate on the other hand, takes a generator and tells the Elm runtime to run that generator. It also tells the runtime which message to send when a number is ready. We haven’t defined the NewRandomNumber message yet; we’ll do that soon.

Why do we have to supply a message name to generate? Why can’t it just return a random number immediately like step did? It’s due to
the fact that we aren’t manually providing an initial seed value anymore. We need to generate a seed by using our computer’s clock, which produces side effects.
To run things that generate side effects, Elm requires us to create a command along with any pertinent information that command needs. We then hand that command over to the runtime. The runtime executes the command and notifies our application with the result by sending the message included in the command. The following diagram illustrates this process.

Here’s what the generate function’s type signature looks like:
generate : (a -> msg) -> Generator a -> Cmd msgThe first argument is a function that takes a value and wraps it in a message. In our case, that’s NewRandomNumber. Remember, messages that take an argument are essentially functions. If you check the type of NewRandomNumber in repl, you will see that it takes an integer and returns a message of type Msg.
> type Msg = NewRandomNumber Int

> NewRandomNumber
<function> : Int -> Msg
The second argument to generate is a random number generator. In our case, it’s Random.int, which takes the range as inputs (e.g., 0 100). Lastly, generate returns a command that encapsulates the message and the generator. The next step is to add NewRandomNumber to the Msg type and also handle it in the update function as shown below.
type Msg
    = GenerateRandomNumber
    | NewRandomNumber Int


update : Msg -> Model -> ( Model, Cmd Msg )
update msg model =
    case msg of
        GenerateRandomNumber ->
            ( model, Random.generate NewRandomNumber (Random.int 0 100) )

        NewRandomNumber number ->
            ( number, Cmd.none )
When the NewRandomNumber message is received, we simply return the number in payload as our model and an empty list of commands. Let’s import the Html.Events and Random modules next and add an onClick attribute to our button so that the GenerateRandomNumber message gets triggered when it’s clicked.
module RandomNumber exposing (Model)

import Html exposing (..)
import Html.Events exposing (onClick)
import Random

.
.
view : Model -> Html Msg
view model =
    div []
        [ button [ onClick GenerateRandomNumber ]
            [ text "Generate Random Number" ]
        , text (String.fromInt model)
        ]
Don’t forget to replace msg with Msg in view’s type annotation. We actually need to make that replacement in init as well.
init : ( Model, Cmd Msg )
init =
    ...
Wiring Everything Up
Let’s wire up everything we have built so far by adding main to the bottom of RandomNumber.elm.
main : Program () Model Msg
main =
    Browser.element
        { init = \flags -> ( initialModel, Cmd.none )
        , view = view
        , update = update
        , subscriptions = \_ -> Sub.none
        }
With the introduction of commands, main also became slightly more complex. Here’s how it was in the counter app:
main : Program () Model Msg
main =
    Browser.sandbox
        { init = initialModel
        , view = view
        , update = update
        }
Let’s go through each change one by one.
Change #1: We’re now using Browser.element instead of Browser.sandbox to wire everything up. The former takes a record with four fields whereas the latter takes a record with only three fields.
- Browser.sandbox vs Browser.element
Browser.sandboxcreates an Elm program that cannot communicate with the outside world by issuing commands. That’s why the counter app’s update function returns only a model and no commands.-
update : Msg -> Model -> Model -
In contrast, Elm programs created with
Browser.elementare able to communicate with the outside world. That’s why the random number app’s update function returns a tuple containing a model and commands. -
update : Msg -> Model -> ( Model, Cmd Msg ) -
When you’re building an Elm app, it’s good to start with
Browser.sandboxand wait for a use case that requires the app to communicate with the outside world. Once that use case arrives, you can upgrade toBrowser.element.
Change #2: The init field in Browser.element expects a function that takes flags and returns a tuple containing model and commands. The init function we wrote earlier returns just the tuple. Let’s use it here, but before we do that let’s clean things up a bit by moving flags to the init function.
init : flagsType -> ( Model, Cmd Msg )
init flags =
    ( 0, Cmd.none )
If we want to pass values to an Elm app during initialization we need to send them as flags. The RandomNumber app doesn’t need flags, but the Browser.element function expects us to include it in our init function anyway. In chapter 8, we’ll implement a feature that actually uses flags.
Since we aren’t passing any flags to our app, we don’t know what its type should be. That’s why we used the flagsType type variable to indicate it can be anything. Although a type variable is fine, it’s better to use () — the unit type — instead for an unused parameter’s type. So let’s replace flagsType with (). Let’s also replace flags with _ since that parameter isn’t being used anywhere inside init’s body.
init : () -> ( Model, Cmd Msg )
init _ =
    ( 0, Cmd.none )
Note: If you don’t remember the difference between () and _, go ahead and refresh your memory by reviewing the Unit Type vs Underscore section from chapter 4.
Now replace the anonymous function in Browser.element with init.
Browser.element
    { init = init
    .
    .
Change #3: subscriptions represents things we want to listen to, for example web socket messages and location changes. By assigning \_ -> Sub.none, we let the Elm runtime know that we aren’t interested in listening to anything right now. We’ll cover subscriptions in detail later in chapter 8. The only thing remaining is to import the Browser module.
module RandomNumber exposing (main)

import Browser
.
.
We’re now ready to test our app. Run elm reactor from the beginning-elm directory in terminal if it’s not running already, and go to this URL in your browser: http://localhost:8000/src/RandomNumber.elm. You should see a view that looks like this:
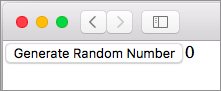
Click the Generate Random Number button multiple times and you should see a different number each time.
Summary
In this section, we learned how to use commands to execute operations that cause side effects. Here is how the Elm Architecture looks with the introduction of commands:

The interaction between the Elm runtime and our code has also become a bit more complex now that we are using commands. The sequence diagram below shows that interaction.

Commands are an important concept in Elm. We need to understand them well in order to build complex applications. In chapter 6, we’ll continue to explore how commands can help us execute one of the most common operations performed in web apps — sending and receiving data from an HTTP server — without sacrificing our application code’s purity. Here is the entire code from RandomNumber.elm:
module RandomNumber exposing (main)

import Browser
import Html exposing (..)
import Html.Events exposing (onClick)
import Random


type alias Model =
    Int


init : () -> ( Model, Cmd Msg )
init _ =
    ( 0, Cmd.none )


view : Model -> Html Msg
view model =
    div []
        [ button [ onClick GenerateRandomNumber ]
            [ text "Generate Random Number" ]
        , text (String.fromInt model)
        ]


type Msg
    = GenerateRandomNumber
    | NewRandomNumber Int


update : Msg -> Model -> ( Model, Cmd Msg )
update msg model =
    case msg of
        GenerateRandomNumber ->
            ( model, Random.generate NewRandomNumber (Random.int 0 100) )

        NewRandomNumber number ->
            ( number, Cmd.none )


main : Program () Model Msg
main =
    Browser.element
        { init = init
        , view = view
        , update = update
        , subscriptions = \_ -> Sub.none
        }