In the Pure Functions section, we learned that it’s much easier to verify an Elm function’s correctness compared to functions written in a language that lacks purity. In this section, we will find out why that is the case. We will also write quite a few tests to make sure that our implementation of various functions in the RippleCarryAdder module is correct. First, we need to learn how to write tests in Elm.
Setting Up Our Project for Tests
Before we can write tests in Elm, we need to first set some things up in our project using a tool called elm-test. Let’s install it by running the following command from the beginning-elm directory in terminal.
$ npm install elm-test -gIn the Installing Node.js section,
we learned that one of the reasons we had to install Node.js was so that we could use NPM (Node.js Package Manager) to install tools and packages needed for building front-end web applications. A good number of tools in the Elm ecosystem are also distributed as NPM packages. elm-test is one of them. It allows us to run Elm tests from the terminal or a continuous integration server.
Now that elm-test has been installed, we can use it to set up our project for writing tests. Run the following command from the beginning-elm directory in terminal.
$ elm-test initYou should see the following message.
Here is my plan:

  Add:
    elm/random               1.0.0
    elm-explorations/test    1.2.2

Would you like me to update your elm.json accordingly? [Y/n]:
Answer Y. elm-exploration/test is an Elm package for writing tests. It depends on another package called elm/random. That’s why we need both. Once the installation is complete, the test-dependencies section of our elm.json should be updated like this:
{
    .
    .
    "test-dependencies": {
        "direct": {
            "elm-explorations/test": "1.2.2"
        },
        "indirect": {
            "elm/random": "1.0.0"
        }
    }
}
Note: elm-exploration/test is different from the elm-test command-line tool. The former is an Elm package for writing tests whereas the latter is a NPM package for running those tests in the terminal.
It’s best practice to keep the dependencies for tests and application code separate. That’s why elm.json provides separate areas for those.
{
    "dependencies": {
        .
        .
    },
    "test-dependencies": {
        .
        .
    }
}
The elm-test init command also creates a new directory called tests inside beginning-elm. All it has right now is an example test file.

Example.elm
We’ll be using the Example.elm file to understand how Elm tests work. Here is how it looks right now:
module Example exposing (suite)

import Expect exposing (Expectation)
import Fuzz exposing (Fuzzer, int, list, string)
import Test exposing (..)


suite : Test
suite =
    todo "Implement our first test. See https://package.elm-lang.org/packages/elm-explorations/test/latest for how to do this!"
It imports three modules:
- Expect is for specifying how we expect our code to behave.
- Fuzz is for writing fuzz tests.
- Test is for creating and managing tests.
Example.elm also includes a placeholder for implementing our first test inside the value called suite. In programming terminology, test suite is a collection of tests that verify a program’s behavior.
There is no special syntax for writing tests in Elm. The formatting rules that apply to normal functions and values we’ve seen so far also apply to tests.
Note: The code above shows that suite returns a value of type Test. Since we haven’t covered type system yet, we’ll continue to omit type annotations in this section as well to avoid any confusion.
Writing Our First Unit Test
Now that all the packages needed for writing and running tests are installed and imported, we’re ready to write our first test. Let’s replace the placeholder implementation inside suite in Example.elm with a real unit test.
suite =
    test "two plus two equals four"
        (\_ -> Expect.equal 4 (2 + 2))
To execute this test all we have to do is run elm-test from the beginning-elm directory in terminal.
$ elm-testWarning: If you get the “Invalid Package Dependencies” error, run elm install elm/json from the beginning-elm directory in terminal. Answer Y and then run elm-test again. This post explains why that error may occur.
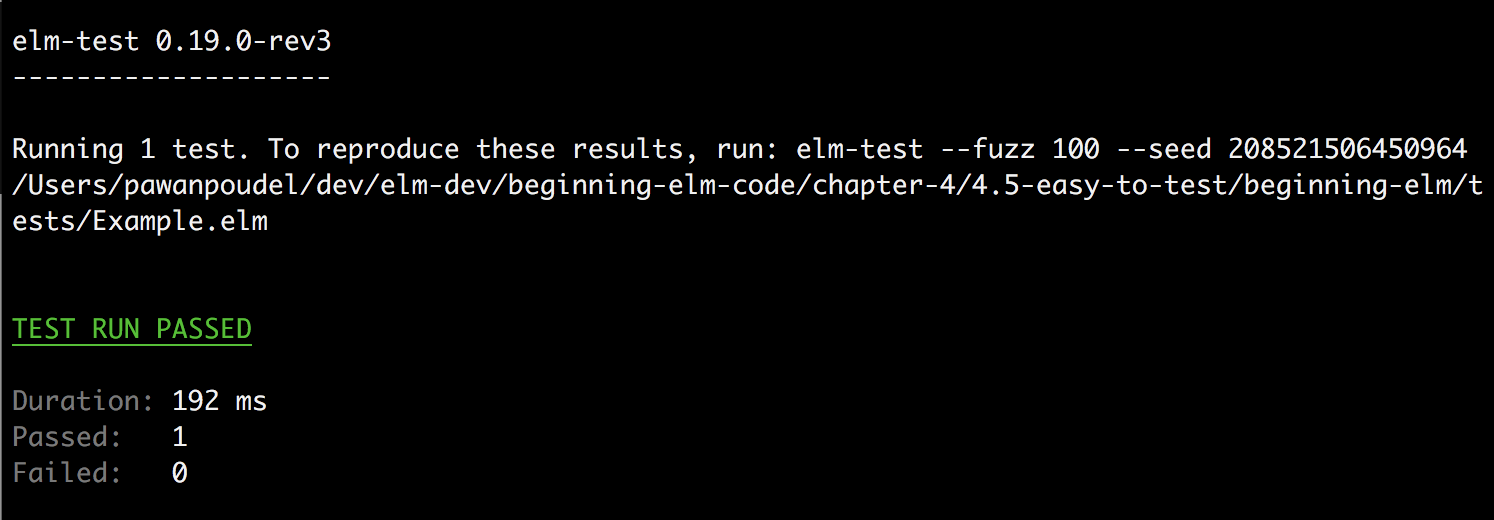
If you don’t run into any errors, you should see an output like this:
- Reproducing a Test Result
- Notice the following instructions in the above output.
-
To reproduce these results, run: elm-test --fuzz 100 --seed <seed-value> -
It is meant for a fuzz test. We’ll go over what this instruction means in the Fuzz Testing section later in this chapter.
Now let’s understand how the test we wrote earlier actually works. The following diagram explains the syntax for writing a unit test in Elm.

The test function requires us to wrap our test in an anonymous function. That’s why we can’t just write it like this:
test "two plus two equals four"
    (Expect.equal 4 (2 + 2))
This is due to how things are implemented internally in elm-test. To make things easier, elm-test wants to have control over when and how tests get executed. By putting a test inside a function we’re giving up that control because when we define a function, Elm doesn’t execute it immediately. It waits for some other code to apply it first.
In the Function section, we learned that every function in Elm, including anonymous functions, must receive at least one argument. So what argument does elm-test pass to the anonymous function we used earlier to wrap our test? To find out, let’s look at the test function’s type signature.

As it turns out, the argument passed to our anonymous function is ().
Unit Type
Sine the argument given to the anonymous function never gets used inside the test, elm-test doesn’t even bother to pass an argument that can be used in a meaningful way. It just passes an empty value represented by (), which means an empty tuple in Elm. It’s also known as the unit type. It’s often used to represent an empty value. When we enter () in the repl, its type is also displayed as ().
> ()
() : ()![]()
Note: We will cover types in detail in the Type System section, but for now think of it as something that represents a collection of values that have similar properties. For example, the type Int represents numbers with no fractional part: -1, 0, 1, 2, etc. And the type Bool represents logical values True and False.
Elm uses the () symbol to represent both value and type. There can only ever be one value of the unit type: (). That’s because the number of elements in a tuple determines its type. For example, the following two tuples have completely different types even though they both contain the same type of values.
> ( 1, 2 )
(1,2) : ( number, number1 )

> ( 1, 2, 3 )
(1,2,3) : ( number, number1, number2 )
For two tuples to be of the same type, they must contain the same number and type of values. In contrast, two lists containing the same type of values but different lengths have the exact same type.
> [ 1, 2 ]
[1,2] : List number

> [ 1, 2, 3 ]
[1,2,3] : List number
() vs _
It’s common in Elm to use an underscore (_) when we want to ignore a parameter. Here’s a simple anonymous function that always returns 0:
> List.map (\_ -> 0) [ 1, 2, 3 ]
[0,0,0] : List number

> List.map (\_ -> 0) [ 'a', 'b', 'c' ]
[0,0,0] : List number
Note: If you don’t remember how the List.map function works, go ahead and refresh your memory by reviewing the Mapping a List section.
The (\_ -> 0) anonymous function doesn’t use its parameter to compute a return value. So instead of giving a name to the parameter, it just uses _.
On the surface, _ and () seem to be used for the same purpose: ignoring a parameter. But if we look deeper, there’s a subtle difference. Although (\_ -> 0) ignores its parameter, it allows us to pass any type of value to it. In the example above, we first gave it numbers and then characters. Will it still allow us to pass any type of value if we switched to () from _? Let’s find out.
> List.map (\() -> 0) [ 1, 2, 3 ]

---------------- TYPE MISMATCH ----------------
The 2nd argument to `map` is not what I expect:

4|   List.map (\() -> 0) [ 1, 2, 3 ]
                         ^^^^^^^^^^^
This argument is a list of type:

    List number

But `map` needs the 2nd argument to be:

    List ()
No it doesn’t. (\() -> 0) only accepts a value of type (), nothing else.
> List.map (\() -> 0) [ (), (), () ]
[0,0,0] : List number
_ means any value, whereas () means only unit type value. By replacing _ with (), we severely limited our input options. If you just want to ignore a parameter without limiting the types of input values that can be passed to your function, then use _. On the other hand, if no meaningful argument will ever get passed to your function, then use (). Why then are we using _ instead of () in our test?
test "two plus two equals four"
    (\_ -> Expect.equal 4 (2 + 2))
That’s because we know elm-test only ever passes the unit type to our anonymous function. Therefore, whether we use () or _ doesn’t really make any difference and since _ is easier to type we went with that.
Failed Test
Let’s see how the output looks when our test fails. Change the expected value from 4 to 3 in Example.elm.
suite =
    test "two plus two equals four"
        (\_ -> Expect.equal 3 (2 + 2))
Run elm-test from the beginning-elm directory in terminal and you should see the following output.

The output shows the actual value before the expected value, but in our test the actual value is placed after the expected value. Can we rewrite our test so that it closely resembles the output? Yes we can. Update the test in Example.elm like this:
suite =
    test "two plus two equals four"
        (\_ -> (2 + 2) |> Expect.equal 3)
The |> operator passes the result from the expression on the left as the last argument to the function on the right. If you are fuzzy on how |> works, go back and review the Forward Function Application section from chapter 3. Now the output closely resembles our test.
(2 + 2) |> Expect.equal 3 -- Our test
Because of this resemblance, it’s easier to notice that our expected result is incorrect. When we wrote our test like this:
Expect.equal 3 (2 + 2)The test code wasn’t in the same order as the output, so it was harder to visually compare them and locate the offending code. Change the expected value back to 4 to pass the test. |> improves the readability even more in a complex test. Here’s an example:
guardianNames =
    test "only 2 guardians have names with less than 6 characters"
        (\_ ->
            let
                guardians =
                    [ "Star-lord", "Groot", "Gamora", "Drax", "Rocket" ]
            in
            guardians
                |> List.map String.length
                |> List.filter (\x -> x < 6)
                |> List.length
                |> Expect.equal 2
        )
Add that test to the bottom of Example.elm and also expose it in the module declaration.
module Example exposing (guardianNames, suite)Run elm-test from the beginning-elm directory in terminal and you should see two passing tests. The anonymous function given to the test function as an argument is like any other function, except it doesn’t have a name. We can use anything inside it that’s allowed in a normal function including a let expression.
The test inside guardianNames verifies that there are only two guardians whose names have less than six characters in them. We applied three different transformations to the original list to get to the final number. As you can see, the |> operator significantly improved the readability of our test. When a test contains a complex computation like this, the anonymous function tends to take the following shape:
\_ ->
    someComputation
        |> producing
        |> actualValue
        |> Expect.equal expectedValue
If we didn’t use |>, our test would be very hard to read. Here is the same test without |>:
Expect.equal 2
    (List.length (List.filter (\x -> x < 6) (List.map String.length guardians)))
Not only those parentheses get in the way, but the function logic also starts on the far right whereas English reads from left to right. Hence, reading that test feels a bit unnatural.
Maintaining a Suite of Well Written Tests
When a test fails, it could mean two things: either we made a mistake writing the test or the logic inside the code under test is incorrect. If the logic is incorrect, we obviously have to fix it. If the test itself is incorrect, we should either fix or remove it. In our first test, the expression 2 + 2 will never produce 3. Therefore, the test is incorrect.
A suite of well written tests play a critical role in refactoring the existing code. It gives us the confidence to rearrange our code so that we can make it easier to read and maintain. If we make a mistake, a test will catch it. For that reason, it’s important to keep our test suite clean by removing any incorrectly written failing tests.
- Refactoring
- “Refactoring is the process of changing a software system in such a way that it does not alter the external behavior of the code yet improves the internal structure.” - Martin Fowler
Improving Our Tests with <|
|> made our tests quite readable. We can make them even better by replacing the parentheses around anonymous functions with <|. Update the tests in Example.elm as shown below.
suite =
    test "two plus two equals four" <|
        \_ -> (2 + 2) |> Expect.equal 4


guardianNames =
    test "only 2 guardians have names with less than 6 characters" <|
        \_ ->
            let
                guardians =
                    [ "Star-lord", "Groot", "Gamora", "Drax", "Rocket" ]
            in
            guardians
                |> List.map String.length
                |> List.filter (\x -> x < 6)
                |> List.length
                |> Expect.equal 2
<| is quite useful for avoiding parentheses. Here is another example from the Backward Function Application section.
main =
    Html.text (toString (add 5 (multiply 10 (divide 30 10))))
We can replace those pesky parentheses with <| like this:
main =
    Html.text <| toString <| add 5 <| multiply 10 <| divide 30 10
Ah, much better!
Grouping Similar Tests with describe
Let’s rename suite to additionTests and add one more test to it in Example.elm.
additionTests =
    describe "Addition"
        [ test "two plus two equals four" <|
            \_ -> (2 + 2) |> Expect.equal 4
        , test "three plus four equals seven" <|
            \_ -> (3 + 4) |> Expect.equal 7
        ]
Don’t forget to replace suite with additionaTests in the module declaration.
module Example exposing (additionTests, guardianNames)Run elm-test from the beginning-elm directory in terminal and you should see three passing tests. The describe function is used to group related tests. Notice that we didn’t use <| on the line that contains describe. That’s because describe doesn’t need to wrap its second argument (a list of tests) in parentheses.
More Expectations
The Expect module also provides functions for expressing expectations other than equality. Let’s find out what they are. Add the following tests to the bottom of Example.elm.
comparisonTests =
    describe "Comparison"
        [ test "2 is not equal to 3" <|
            \_ -> 2 |> Expect.notEqual 3
        , test "4 is less than 5" <|
            \_ -> 4 |> Expect.lessThan 5
        , test "6 is less than or equal to 7" <|
            \_ -> 6 |> Expect.atMost 7
        , test "9 is greater than 8" <|
            \_ -> 9 |> Expect.greaterThan 8
        , test "11 is greater than or equal to 10" <|
            \_ -> 11 |> Expect.atLeast 10
        , test "a list with zero elements is empty" <|
            \_ ->
                List.isEmpty []
                    |> Expect.true "expected the list to be empty"
        , test "a list with some elements is not empty" <|
            \_ ->
                List.isEmpty [ "Jyn", "Cassian", "K-2SO" ]
                    |> Expect.false "expected the list not to be empty"
        ]
And expose comparisonTests in the module definition.
module Example exposing (additionTests, guardianNames, comparisonTests)Now run elm-test from the beginning-elm directory in terminal and you should see that all tests have passed. The tests above are self-explanatory except the last two. Expect.true and Expect.false require us to pass a string as the first argument. When a test fails, that string is used to explain why the test failed. Make the test that uses Expect.true fail by passing a non-empty list like this:
comparisonTests =
    describe "Comparison"
        .
        .
        , test "a list with zero elements is empty" <|
            \_ ->
                List.isEmpty [ "The Ancient One" ]
                    |> Expect.true "expected the list to be empty"
        .
        .
Run elm-test once again and you should see the string we gave to Expect.true being used as an explanation for why the test failed.

Remove "The Ancient One" from the list in above test so that it passes again. The Expect module provides even more ways to express expectations. You can learn all about them here.
Now that we’re familiar with how to write tests in Elm, let’s turn our attention to testing various functions in the RippleCarryAdder.elm file we created earlier in the Solving Complex Problems with Simple Functions section.
Testing the inverter Function
Let’s start with the inverter function which is the easiest one to test. To refresh your memory, here’s how the function looks:
inverter a =
    case a of
        0 ->
            1

        1 ->
            0

        _ ->
            -1
Create a new file called RippleCarryAdderTests.elm in the beginning-elm/tests directory and add the code below to it.

module RippleCarryAdderTests exposing (inverterTests)

import Expect exposing (Expectation)
import Fuzz exposing (..)
import RippleCarryAdder exposing (..)
import Test exposing (..)


inverterTests =
    describe "Inverter"
        [ test "output is 0 when the input is 1" <|
            \_ ->
                inverter 0
                    |> Expect.equal 1
        , test "output is 1 when the input is 0" <|
            \_ ->
                inverter 1
                    |> Expect.equal 0
        ]
Each test case in inverterTests represents a row from an inverter’s truth table we saw in the Inverter section.

Run the following command from the beginning-elm directory in terminal to execute the tests inside inverterTests.
$ elm-test tests/RippleCarryAdderTests.elmelm-test allows us to run tests from a specific file. All we have to do is give it a filename. When we run elm-test without any arguments, it goes through all .elm files in the beginning-elm/tests directory and runs every test in them. For the remainder of this section, we’ll focus on testing the RippleCarryAdder module, so we’ll be running the tests in RippleCarryAdderTests.elm only.
Testing the andGate Function
Testing the andGate function is very similar to testing inverter. We just need to account for all four possible outcomes. Here’s how the andGate function looks:
andGate a b =
    Bitwise.and a b
Add the following tests to the bottom of RippleCarryAdderTests.elm.
andGateTests =
    describe "AND gate"
        [ test "output is 0 when both inputs are 0" <|
            \_ ->
                andGate 0 0
                    |> Expect.equal 0
        , test "output is 0 when the first input is 0" <|
            \_ ->
                andGate 0 1
                    |> Expect.equal 0
        , test "output is 0 when the second input is 0" <|
            \_ ->
                andGate 1 0
                    |> Expect.equal 0
        , test "output is 1 when both inputs are 1" <|
            \_ ->
                andGate 1 1
                    |> Expect.equal 1
        ]
And expose andGateTests in the module definition.
module RippleCarryAdderTests exposing (andGateTests, inverterTests)Like inverterTests, each test in andGateTests represents a row from an AND gate’s truth table.

Run elm-test tests/RippleCarryAdderTests.elm from the beginning-elm directory in terminal to execute the tests inside andGateTests.
Exercise 4.5.1
Using andGateTests as a reference, write tests for the orGate function whose definition looks like this:
orGate a b =
    Bitwise.or a b
Here’s the truth table for an OR gate:

After you’ve written the tests, don’t forget to run them to make sure they all pass.
Testing the halfAdder Function
A half adder is slightly more complex because it produces two outputs: sum and carry-out.
halfAdder a b =
    let
        d =
            orGate a b

        e =
            andGate a b
                |> inverter

        sumDigit =
            andGate d e

        carryOut =
            andGate a b
    in
        { carry = carryOut
        , sum = sumDigit
        }
Even though it produces multiple outputs, the tests for the halfAdder function look very similar to the andGate tests. Add the following tests to the bottom of RippleCarryAdderTests.elm.
halfAdderTests =
    describe "Half adder"
        [ test "sum and carry-out are 0 when both inputs are 0" <|
            \_ ->
                halfAdder 0 0
                    |> Expect.equal { carry = 0, sum = 0 }
        , test "sum is 1 and carry-out is 0 when the 1st input is 0 and the 2nd input is 1" <|
            \_ ->
                halfAdder 0 1
                    |> Expect.equal { carry = 0, sum = 1 }
        , test "sum is 1 and carry-out is 0 when the 1st input is 1 and the 2nd input is 0" <|
            \_ ->
                halfAdder 1 0
                    |> Expect.equal { carry = 0, sum = 1 }
        , test "sum is 0 and carry-out is 1 when both inputs are 1" <|
            \_ ->
                halfAdder 1 1
                    |> Expect.equal { carry = 1, sum = 0 }
        ]
And expose halfAdderTests in the module definition.
module RippleCarryAdderTests exposing
    ( andGateTests
    , halfAdderTests
    , inverterTests
    , orGateTests
    )
Each test case in halfAdderTests represents a row from the half adder’s truth table.

Run elm-test tests/RippleCarryAdderTests.elm from the beginning-elm directory in terminal to execute the tests inside halfAdderTests.
Testing the fullAdder Function
Here’s how the fullAdder function looks:
fullAdder a b carryIn =
    let
        firstResult =
            halfAdder b carryIn

        secondResult =
            halfAdder a firstResult.sum

        finalCarry =
            orGate firstResult.carry secondResult.carry
    in
        { carry = finalCarry
        , sum = secondResult.sum
        }
It takes one more input (carryIn) compared to the halfAdder function. Therefore, we have to account for all eight combinations of inputs as shown in the truth table below.

Add the following tests to the bottom of RippleCarryAdderTests.elm.
fullAdderTests =
    describe "Full adder"
        [ test "sum and carry-out are 0 when both inputs and carry-in are 0" <|
            \_ ->
                fullAdder 0 0 0
                    |> Expect.equal { carry = 0, sum = 0 }
        , test "sum is 1 and carry-out is 0 when both inputs are 0, but carry-in is 1" <|
            \_ ->
                fullAdder 0 0 1
                    |> Expect.equal { carry = 0, sum = 1 }
        , test "sum is 1 and carry-out is 0 when the 1st input is 0, the 2nd input is 1, and carry-in is 0" <|
            \_ ->
                fullAdder 0 1 0
                    |> Expect.equal { carry = 0, sum = 1 }
        , test "sum is 0 and carry-out is 1 when the 1st input is 0, the 2nd input is 1, and the carry-in is 1" <|
            \_ ->
                fullAdder 0 1 1
                    |> Expect.equal { carry = 1, sum = 0 }
        , test "sum is 1 and carry-out is 0 when the 1st input is 1, the 2nd input is 0, and the carry-in is 0" <|
            \_ ->
                fullAdder 1 0 0
                    |> Expect.equal { carry = 0, sum = 1 }
        , test "sum is 0 and carry-out is 1 when the 1st input is 1, the 2nd input is 0, and the carry-in is 1" <|
            \_ ->
                fullAdder 1 0 1
                    |> Expect.equal { carry = 1, sum = 0 }
        , test "sum is 0 and carry-out is 1 when the 1st input is 1, the 2nd input is 1, and the carry-in is 0" <|
            \_ ->
                fullAdder 1 1 0
                    |> Expect.equal { carry = 1, sum = 0 }
        , test "sum is 1 and carry-out is 1 when the 1st input is 1, the 2nd input is 1, and the carry-in is 1" <|
            \_ ->
                fullAdder 1 1 1
                    |> Expect.equal { carry = 1, sum = 1 }
        ]
And expose fullAdderTests in the module definition.
module RippleCarryAdderTests exposing
    ( andGateTests
    , fullAdderTests
    .
    .
Like all other tests we’ve written so far, the tests inside fullAdderTests represent rows from the full adder’s truth table. Run elm-test tests/RippleCarryAdderTests.elm from the beginning-elm directory in terminal to execute the tests inside fullAdderTests.
The test descriptions in fullAdderTests are too long. It makes reading the tests difficult. We can improve the readability by grouping similar tests inside a describe block. Rewrite fullAdderTests as shown below.
fullAdderTests =
    describe "Full adder"
        [ describe "when both inputs are 0"
            [ test "and carry-in is 0 too, then both sum and carry-out are 0" <|
                \_ ->
                    fullAdder 0 0 0
                        |> Expect.equal { carry = 0, sum = 0 }
            , test "but carry-in is 1, then sum is 1 and carry-out is 0" <|
                \_ ->
                    fullAdder 0 0 1
                        |> Expect.equal { carry = 0, sum = 1 }
            ]
        , describe "when the 1st input is 0, and the 2nd input is 1"
            [ test "and carry-in is 0, then sum is 1 and carry-out is 0" <|
                \_ ->
                    fullAdder 0 1 0
                        |> Expect.equal { carry = 0, sum = 1 }
            , test "and carry-in is 1, then sum is 0 and carry-out is 1" <|
                \_ ->
                    fullAdder 0 1 1
                        |> Expect.equal { carry = 1, sum = 0 }
            ]
        , describe "when the 1st input is 1, and the 2nd input is 0"
            [ test "and carry-in is 0, then sum is 1 and carry-out is 0" <|
                \_ ->
                    fullAdder 1 0 0
                        |> Expect.equal { carry = 0, sum = 1 }
            , test "and carry-in is 1, then sum is 0 and carry-out is 1" <|
                \_ ->
                    fullAdder 1 0 1
                        |> Expect.equal { carry = 1, sum = 0 }
            ]
        , describe "when the 1st input is 1, and the 2nd input is 1"
            [ test "and carry-in is 0, then sum is 0 and carry-out is 1" <|
                \_ ->
                    fullAdder 1 1 0
                        |> Expect.equal { carry = 1, sum = 0 }
            , test "and carry-in is 1, then sum is 1 and carry-out is 1" <|
                \_ ->
                    fullAdder 1 1 1
                        |> Expect.equal { carry = 1, sum = 1 }
            ]
        ]
They are much easier to read now. It’s recommended that you group similar tests inside a describe block whenever you can. We should always look for ways to improve the readability of our tests. In addition to verifying the behavior of our code, tests also act as a documentation describing how that code should behave. Therefore, improving the readability of our tests is just as important as improving the readability of our code.
We can nest as many describe blocks as we want. Here’s fullAdderTests rewritten again with multiple describe blocks:
fullAdderTests =
    describe "Full adder"
        [ describe "when both inputs are 0"
            [ describe "and carry-in is 0"
                [ test "both sum and carry-out are 0" <|
                    \_ ->
                        fullAdder 0 0 0
                            |> Expect.equal { carry = 0, sum = 0 }
                ]
            , describe "but carry-out is 1"
                [ test "sum is 1 and carry-out is 0" <|
                    \_ ->
                        fullAdder 0 0 1
                            |> Expect.equal { carry = 0, sum = 1 }
                ]
            ]
        , describe "when the 1st input is 0"
            [ describe "and the 2nd input is 1"
                [ describe "and carry-in is 0"
                    [ test "sum is 1 and carry-out is 0" <|
                        \_ ->
                            fullAdder 0 1 0
                                |> Expect.equal { carry = 0, sum = 1 }
                    ]
                , describe "and carry-in is 1"
                    [ test "sum is 0 and carry-out is 1" <|
                        \_ ->
                            fullAdder 0 1 1
                                |> Expect.equal { carry = 1, sum = 0 }
                    ]
                ]
            ]
        , describe "when the 1st input is 1"
            [ describe "and the 2nd input is 0"
                [ describe "and carry-in is 0"
                    [ test "sum is 1 and carry-out is 0" <|
                        \_ ->
                            fullAdder 1 0 0
                                |> Expect.equal { carry = 0, sum = 1 }
                    ]
                , describe "and carry-in is 1"
                    [ test "sum is 0 and carry-out is 1" <|
                        \_ ->
                            fullAdder 1 0 1
                                |> Expect.equal { carry = 1, sum = 0 }
                    ]
                ]
            ]
        , describe "when the 1st input is 1"
            [ describe "and the 2nd input is 1"
                [ describe "and carry-in is 0"
                    [ test "sum is 0 and carry-out is 1" <|
                        \_ ->
                            fullAdder 1 1 0
                                |> Expect.equal { carry = 1, sum = 0 }
                    ]
                , describe "and carry-in is 1"
                    [ test "sum is 1 and carry-out is 1" <|
                        \_ ->
                            fullAdder 1 1 1
                                |> Expect.equal { carry = 1, sum = 1 }
                    ]
                ]
            ]
        ]
If you run elm-test tests/RippleCarryAdderTests.elm from the beginning-elm directory in terminal, you’ll see the following error.
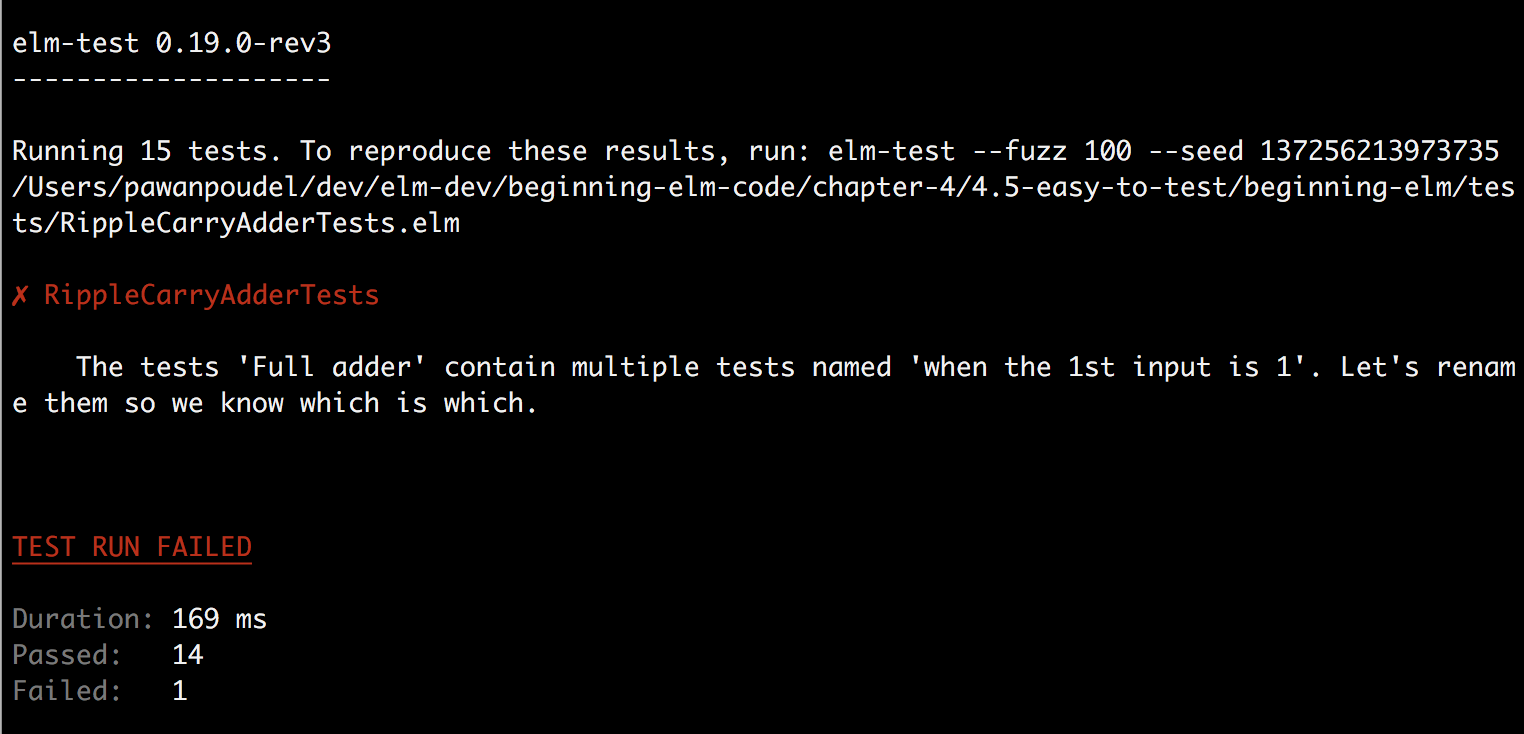
elm-test forces us to provide a unique description for each test that are on the same level. This applies to describe as well. This rule is actually good for detecting misplaced tests. The test cases inside the last describe "when the 1st input is 1" block should really be moved to the one above it. Let’s do that.
fullAdderTests =
    describe "Full adder"
        [ describe "when both inputs are 0"
            [ describe "and carry-in is 0"
                [ test "both sum and carry-out are 0" <|
                    \_ ->
                        fullAdder 0 0 0
                            |> Expect.equal { carry = 0, sum = 0 }
                ]
            , describe "but carry-out is 1"
                [ test "sum is 1 and carry-out is 0" <|
                    \_ ->
                        fullAdder 0 0 1
                            |> Expect.equal { carry = 0, sum = 1 }
                ]
            ]
        , describe "when the 1st input is 0"
            [ describe "and the 2nd input is 1"
                [ describe "and carry-in is 0"
                    [ test "sum is 1 and carry-out is 0" <|
                        \_ ->
                            fullAdder 0 1 0
                                |> Expect.equal { carry = 0, sum = 1 }
                    ]
                , describe "and carry-in is 1"
                    [ test "sum is 0 and carry-out is 1" <|
                        \_ ->
                            fullAdder 0 1 1
                                |> Expect.equal { carry = 1, sum = 0 }
                    ]
                ]
            ]
        , describe "when the 1st input is 1"
            [ describe "and the 2nd input is 0"
                [ describe "and carry-in is 0"
                    [ test "sum is 1 and carry-out is 0" <|
                        \_ ->
                            fullAdder 1 0 0
                                |> Expect.equal { carry = 0, sum = 1 }
                    ]
                , describe "and carry-in is 1"
                    [ test "sum is 0 and carry-out is 1" <|
                        \_ ->
                            fullAdder 1 0 1
                                |> Expect.equal { carry = 1, sum = 0 }
                    ]
                ]
            , describe "and the 2nd input is 1"
                [ describe "and carry-in is 0"
                    [ test "sum is 0 and carry-out is 1" <|
                        \_ ->
                            fullAdder 1 1 0
                                |> Expect.equal { carry = 1, sum = 0 }
                    ]
                , describe "and carry-in is 1"
                    [ test "sum is 1 and carry-out is 1" <|
                        \_ ->
                            fullAdder 1 1 1
                                |> Expect.equal { carry = 1, sum = 1 }
                    ]
                ]
            ]
        ]
Now if you run elm-test tests/RippleCarryAdderTests.elm once again, you should see that all tests have passed.
We shouldn’t go overboard with nesting describe blocks, though. Writing deeply-nested describe blocks could get tedious. That said, nesting does make the output read a little bit better when a test fails. If you try to make a test fail in the example above that has fewer describe blocks, the output will look like this:

Compare that to the output below that shows a failing test from the example that has deeply-nested describe blocks.

There are no set guidelines in Elm for how deep the nesting should go, so use whatever level of nesting you find most readable.
Exercise 4.5.2
See if you can improve the readability of tests in halfAdderTests by adding more describe blocks.
Testing the rippleCarryAdder Function
A 4-bit ripple carry adder has nine inputs and five outputs as shown in the truth table below.

That means there are 512 (2 ^ 9) different permutations of inputs we can test for. That’s a lot of tests, so the question becomes: Do we have to write tests to account for each member in the input set of a function? The answer depends on how much confidence do we have in our function. If we know what our function does is quite straightforward then we might not need as much testing, but if it’s fairly complex with many edge cases then we might need to write more tests to cover those edge cases. In any case, it’s rare to have a function that warrants 100% test coverage.
Quote: “I get paid for code that works, not for tests, so my philosophy is to test as little as possible to reach a given level of confidence.” - Kent Beck
One good thing about testing in Elm is that we can combine different types of tests to achieve the right level of confidence in our code. So far we’ve only written unit tests. Elm also offers another type of testing called fuzz testing. It’s a form of testing where the same test is run over and over with randomly generated inputs. In contrast, a unit test runs the code under test only once with a single input scenario, and then verifies that the output is correct.
The rippleCarryAdder function is a good candidate for fuzz testing, but we’ll have to wait until the Fuzz Testing section to find out how to write those tests. For now, let’s write a few unit tests which will supplement the fuzz tests we will write later. Add the following tests to the bottom of RippleCarryAdderTests.elm.
rippleCarryAdderTests =
    describe "4-bit ripple carry adder"
        [ describe "given two binary numbers and a carry-in digit"
            [ test "returns the sum of those numbers and a carry-out digit" <|
                \_ ->
                    rippleCarryAdder 1001 1101 1
                        |> Expect.equal 10111
            ]
        , describe "when the 1st input is 1111, and the 2nd input is 1111"
            [ test "and carry-in is 0, the output is 11110" <|
                \_ ->
                    rippleCarryAdder 1111 1111 0
                        |> Expect.equal 11110
            , test "and carry-in is 1, the output is 11111" <|
                \_ ->
                    rippleCarryAdder 1111 1111 1
                        |> Expect.equal 11111
            ]
        , describe "when the 1st input is 0000, and the 2nd input is 0000"
            [ test "and carry-in is 0, the output is 0000" <|
                \_ ->
                    rippleCarryAdder 0 0 0
                        |> Expect.equal 0
            , test "and carry-in is 1, the output is 0001" <|
                \_ ->
                    rippleCarryAdder 0 0 1
                        |> Expect.equal 1
            ]
        ]
And expose rippleCarryAdderTests in the module definition.
module RippleCarryAdderTests exposing
    .
    .
    , orGateTests
    , rippleCarryAdderTests
    )
Now run elm-test tests/RippleCarryAdderTests.elm from the beginning-elm directory in terminal to execute the tests inside rippleCarryAdderTests.
We wrote one test to communicate what the function actually does, and two more to test boundary cases. Unit tests are generally useful for testing a specific scenario that either represents an edge case or an input boundary. The first test verifies that the rippleCarryAdder function generates an expected output when we add two binary numbers chosen by us at random. The last four tests verify that a correct output is generated when we add inputs with all 1s and 0s.
In the last two tests, we had to use single digits to represent the binary numbers with leading zeros because elm-format gets rid of zeros in the front when a file is saved. The tests still work because rippleCarryAdder pads zeros in the front if the input number doesn’t have four digits in it.
Summary
Throughout this section we saw many examples that proved our claim that writing tests for pure functions is quite straightforward. All we have to do is properly identify values from the input set, feed those values into the function repeatedly, and verify that the result belongs to the output set. We don’t need to worry about checking whether the function modified its state or caused any other side effects.